
Whip Up Deliciously Easy Healthy Peanut Butter Bars
If you’re looking for a sweet treat that satisfies your cravings without the guilt, you’ve come to the right place! These Healthy Peanut Butter Bars are not only no bake but also easy to make, making them perfect for busy schedules. Bursting with flavor and nutrition, they feature simple ingredients like peanut butter, oat flour, and maple syrup, bringing you a delicious snack that’s wholesome and satisfying. Let’s dive into why you’ll love this recipe and how you can make it your own!
Why You’ll Love This Recipe
- No Bake Convenience: With just a few minutes of prep time, you can whip these bars up without turning on the oven—perfect for warm days or quick snacks.
- Nutritious Ingredients: Made with wholesome ingredients like oat flour and peanut butter, these bars provide a good balance of protein, healthy fats, and fiber.
- Customizable Flavors: This recipe serves as a fantastic base, allowing you to add your favorite mix-ins like nuts, dried fruit, or even protein powder.
- Kid-Friendly: These bars are a great way to introduce kids to healthier snacks without compromising on taste—they’ll love them!
- Meal Prep Friendly: Make these bars ahead of time to have a healthy snack ready whenever the cravings hit. They store well in the fridge or freezer.
Ingredients Needed
Before we get cooking, let’s gather our ingredients. Here’s what you’ll need:
- 1 cup salted peanut butter: Creamy or crunchy, your choice! If you’re using unsalted peanut butter, just add a pinch of salt.
- 1/4 cup + 1 tbsp maple syrup: This will sweeten your bars naturally—feel free to substitute with honey or agave for a different twist.
- 3/4 cup oat flour: Certified gluten-free if needed. You can also use 1 cup of almond flour for a nutty flavor.
- 1 cup chocolate chips: Semi-sweet or dark chocolate chips add a delicious richness. Use dairy-free chips for a vegan option.
- 1/2 cup peanut butter: For the topping—melted and mixed with chocolate for extra flavor.
How to Make Easy Healthy Peanut Butter Bars
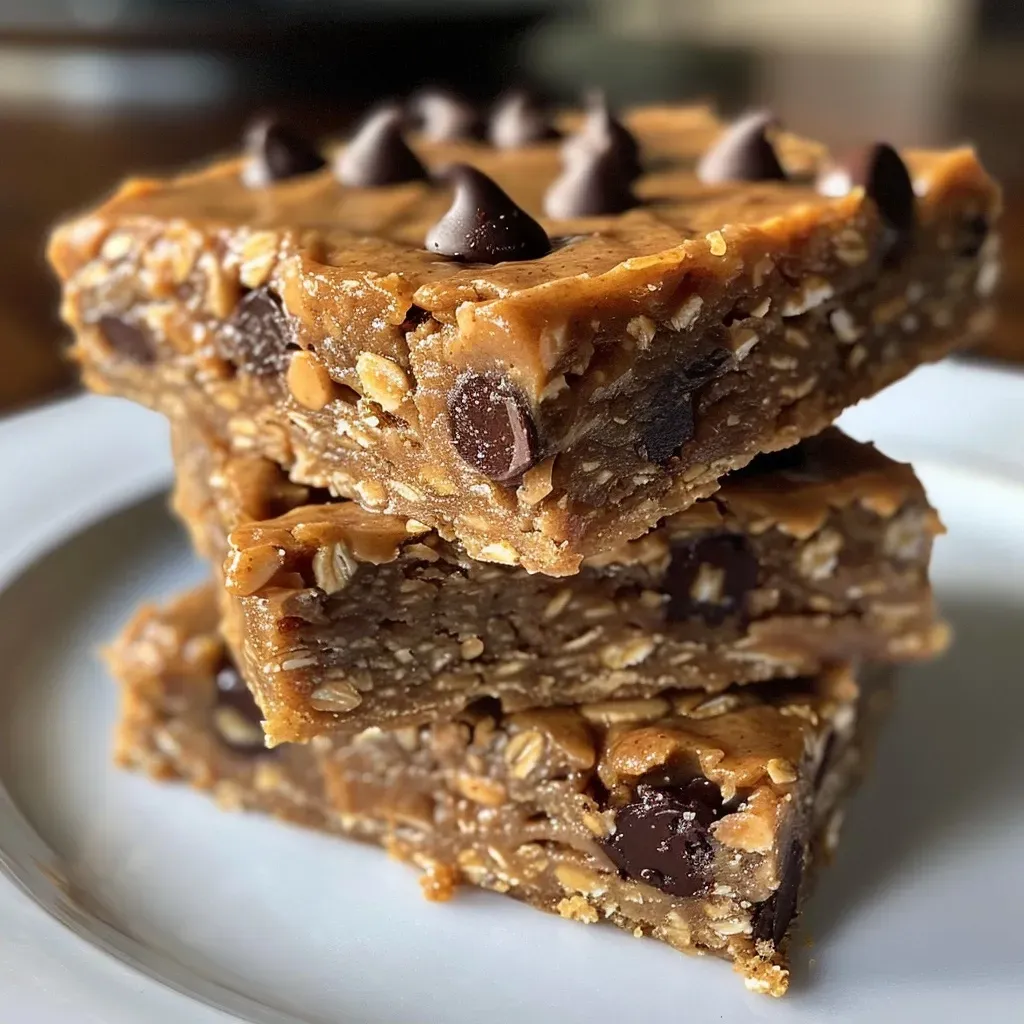
Now, let’s get to the fun part—the preparation! Follow these simple steps:

★ Recommended Kitchen Tool
Professional Chef Knife Set
Make this recipe even easier with a quality Professional Chef Knife Set — a must-have kitchen staple!
- In a medium bowl, mix together the peanut butter, maple syrup, and oat flour until well combined.
- Press the mixture evenly into an 8×8 dish; this will be the base of your bars.
- In a microwave-safe dish, combine the chocolate chips and remaining peanut butter. Microwave in 30-second increments until melted, stirring in between.
- Pour the melted chocolate-peanut butter mixture over the pressed peanut butter base, spreading it evenly.
- Place the dish in the freezer for about one hour to set.
- Once set, cut into bars and serve. These can be stored in the fridge or freezer for later enjoyment!
Pro Tips for Perfect Peanut Butter Bars
- Chill Time: Make sure to allow the bars to chill completely for the best texture. This helps them firm up nicely.
- Use Quality Ingredients: Choose high-quality peanut butter and chocolate for the best flavor and nutritional benefits.
- Press Firmly: When making the base, press down firmly to ensure the bars hold together well.
- Experiment with Mix-Ins: Add nuts, seeds, or dried fruit for extra texture and flavor variations.
- Adjust Sweetness: Taste the mixture before pressing it into the dish, and adjust the sweetness to your liking.
- Cut with Care: Use a sharp knife, and wipe it clean between cuts for neater bars.
- Store Properly: Keep them in an airtight container in the fridge or freezer to maintain freshness.
- Make Ahead: These bars are perfect for meal prep; make a batch on Sunday for easy snacking throughout the week!
Common Mistakes and Troubleshooting
Even the best recipes can have hiccups. Here are some common mistakes and how to avoid them:
- Too Crumbly: If your mixture is too dry, add a splash of water or more maple syrup to help it stick together.
- Too Soft: If the bars don’t hold together, they might need more chilling time. Be patient!
- Uneven Chocolate Layer: Make sure to spread the melted chocolate evenly for consistent flavor in every bite.
- Sticky Base: If the base is sticky, you can lightly dust the surface with a bit of oat flour before pressing down.
Variations You Can Try
Want to mix it up? Here are some fun variations:
- Nutty Crunch: Add chopped nuts like almonds or walnuts to the base for added crunch.
- Chocolate Swirl: Before freezing, swirl in some melted chocolate over the top layer for a marbled effect.
- Dried Fruit Delight: Add raisins, cranberries, or chopped apricots to the mixture for a fruity touch.
- Protein Boost: Mix in a scoop of your favorite protein powder to make these bars even more filling.
Storage and Make-Ahead Instructions
These bars are fantastic for meal prep! Here’s how to store them:
- In the Fridge: Store in an airtight container for up to one week.
- In the Freezer: For longer storage, freeze for up to three months. Just thaw for a few minutes before enjoying!
Frequently Asked Questions
Here are some common questions about making these peanut butter bars:
- Can I use a different nut butter? Yes! Almond butter or cashew butter works great as alternatives.
- Are these bars gluten-free? Yes, just ensure you use certified gluten-free oat flour.
- How do I know when they are ready? The bars should be firm to the touch after chilling for an hour.
- Can I add protein powder to this recipe? Absolutely! Just adjust the amount of oat flour to accommodate.
- What if I don’t have maple syrup? Honey or agave syrup can be used as substitutes.
- How can I make these vegan? Use maple syrup and dairy-free chocolate chips, and choose a vegan nut butter.
- Can I double the recipe? Yes! Just use a larger dish and adjust the chilling time as needed.
- What’s the best way to cut these bars? Use a sharp knife, and wipe it clean between cuts for neat edges.
Nutrition Tips and Dietary Adaptations
These bars are not just tasty; they can also fit into various dietary needs:
- Low-Carb Option: Use a low-carb sweetener and almond flour instead of oat flour.
- Vegan-Friendly: As mentioned, substitute with vegan ingredients to accommodate dietary restrictions.
- Protein-Enhanced: Incorporate protein powder to make these bars a post-workout snack.
Equipment Recommendations
For this recipe, here are the essential tools you’ll need:
- Mixing Bowls: A medium bowl for mixing the base and a microwave-safe bowl for melting chocolate.
- Measuring Cups: Accurate measurements ensure the best results.
- Spatula: A silicone spatula makes it easy to mix and spread the mixtures.
- 8×8 Dish: A square baking dish is perfect for shaping your bars.
Serving Suggestions
These bars are versatile and can be enjoyed in various ways:
- As a Snack: Perfect for a quick pick-me-up during the day.
- With Coffee: Enjoy them alongside your morning coffee for a delightful breakfast treat.
- Post-Workout Fuel: They make an ideal post-exercise snack due to their protein and healthy fats.
Conclusion
These Healthy Peanut Butter Bars are not just a recipe; they’re a way to enjoy wholesome eating without the stress. With their ease of preparation and flexibility, you can make them fit any lifestyle. Remember, healthy eating doesn’t have to be complicated—embrace simplicity, enjoy the process, and savor every bite. Happy cooking!
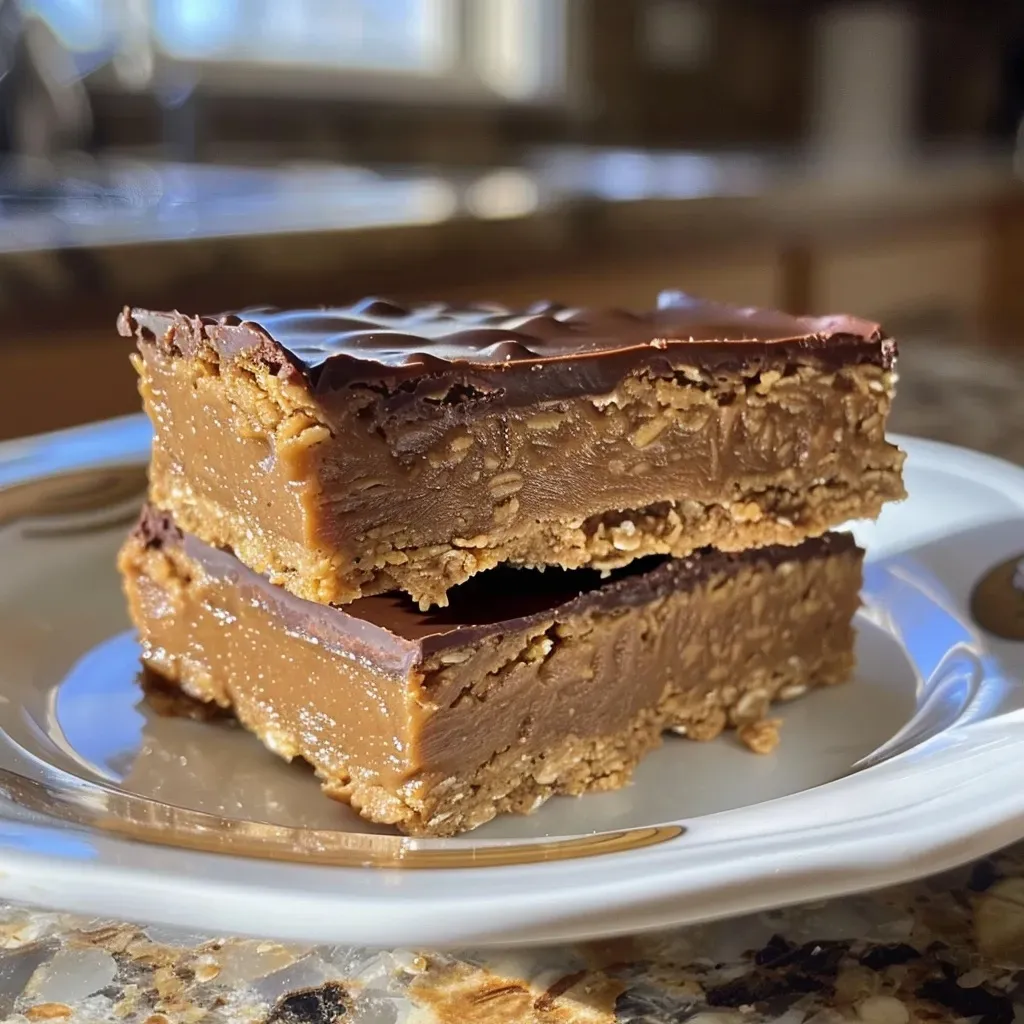
Healthy Peanut Butter Bars Recipe
Ingredients
Base
- 1 cup salted peanut butter (if not salted, add a pinch)
- 1/4 cup maple syrup
- 1 cup oat flour (certified gluten-free (1 cup almond flour also works here))
Topping
- 1 cup chocolate chips
- 1/2 cup peanut butter (remaining peanut butter)
Instructions
- Mix peanut butter, maple syrup, and oat flour until well combined.
- Press mixture into an 8x8 dish.
- Microwave chocolate chips and remaining peanut butter until melted.
- Pour melted chocolate over the peanut butter base.
- Freeze for 1 hour, then cut into bars and serve.


