Author

Olivia

Browsing

Discover the Joy of Healthy Chicken Salad

Welcome to a delightful culinary adventure that marries nutrition and taste! If you’re looking for a quick, easy, and scrumptious recipe that satisfies both your palate and your health goals, then this Healthy Chicken Salad is just what you need. Made with simple ingredients and a touch of love, this dish is perfect for meal prep or a satisfying lunch that’s far from boring. Let’s dive into everything you need to know about crafting this nourishing bite that feels like home.

Why You’ll Love This Recipe

This Healthy Chicken Salad isnโ€™t just a meal; itโ€™s a celebration of flavors and textures. Here are five reasons why this recipe will become a staple in your kitchen:

  • Quick and Easy: Ready in under 30 minutes, this salad is perfect for busy weeknights or last-minute lunches.
  • Meal Prep Friendly: Make a big batch and enjoy it throughout the week. It stays fresh and delicious in the fridge.
  • Nutritious Ingredients: Packed with protein from chicken and healthy fats from nuts and yogurt, this salad is both filling and wholesome.
  • Customizable: Feel free to swap ingredients based on what you have on hand or your dietary preferences.
  • Deliciously Satisfying: With crunchy veggies and creamy dressing, every bite is a delightful experience!

Ingredients Breakdown

To create the perfect chicken salad, you’ll need the following ingredients:


Salad Dressing Shaker

โ˜… Recommended Kitchen Tool

Salad Dressing Shaker

Make this recipe even easier with a quality Salad Dressing Shaker โ€” a must-have kitchen staple!


๐Ÿ›’ View on Amazon โ†’

As an Amazon Associate, we earn from qualifying purchases.
  • 1 pound cooked chicken: Cubed (about 3 cups). You can use rotisserie chicken for convenience or grilled chicken for a smoky flavor.
  • 3/4 cup celery: Diced (about 3 large stalks) for that satisfying crunch.
  • 1/4 cup red onion: Finely chopped for a bit of bite.
  • 1/4 cup fresh herbs: Parsley or dill, finely chopped (optional). Fresh herbs brighten the dish!
  • 1 cup nuts: Pecans, almonds, or cashews, adding a delightful crunch and healthy fats.
  • 1/2 cup plain yogurt: (2+% fat). Greek yogurt adds creaminess and protein.
  • 1/4 cup mayonnaise: Use avocado oil mayo for a healthier option, or adjust to your taste.
  • 2 teaspoons Dijon mustard: For a tangy kick.
  • 1 teaspoon vinegar: Any kind except balsamic, to enhance flavors.
  • 1/2 teaspoon salt: Adjust to taste.
  • Ground black pepper: To taste.

Pro Tips for the Best Chicken Salad
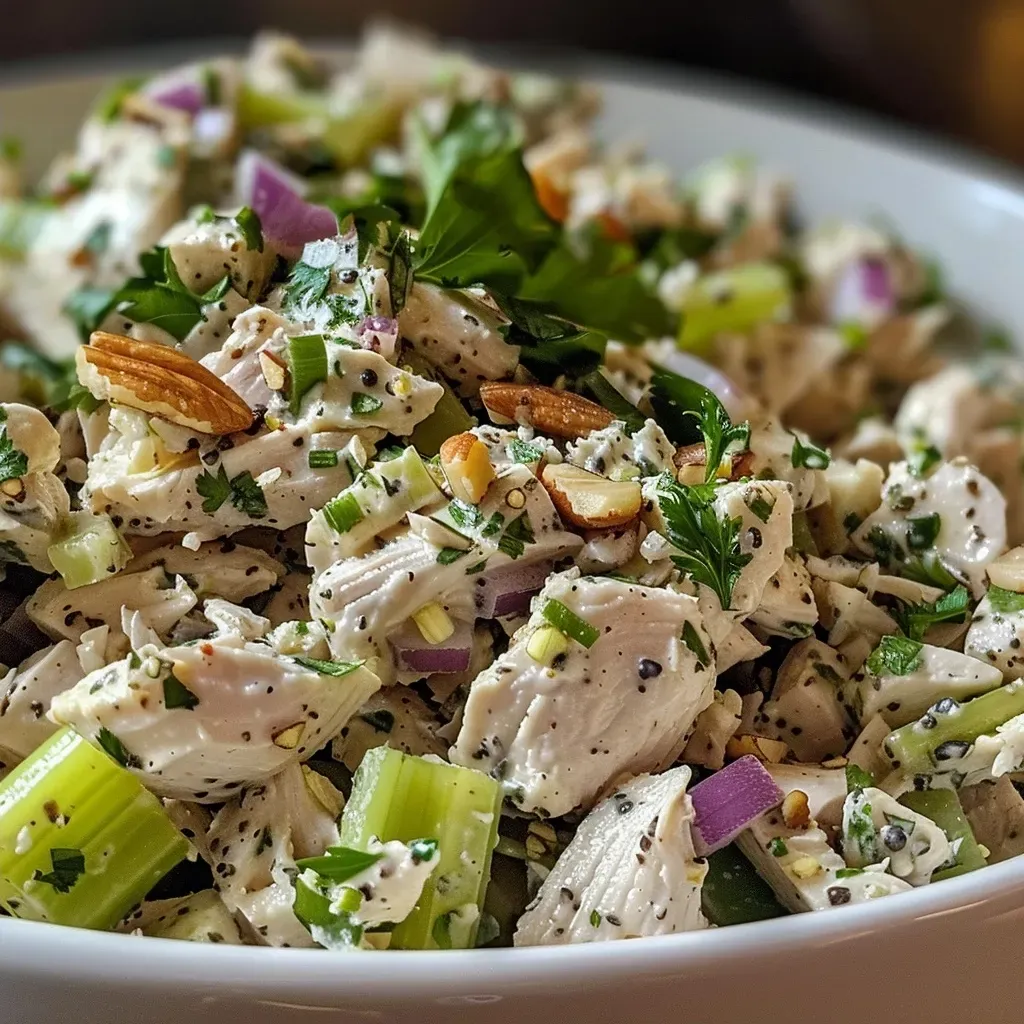
A vibrant chicken salad with diced chicken, celery, and nuts in a bowl.

Elevate your chicken salad skills with these expert insights:

  • Toast your nuts: This simple step enhances their flavor and adds depth to your salad.
  • Let it chill: Refrigerate the salad for at least 2 hours before serving. The flavors meld beautifully when cold.
  • Adjust the creaminess: Play with the ratio of yogurt to mayo based on your preference for creaminess.
  • Use leftover chicken: This is a great way to repurpose leftover grilled or roasted chicken.
  • Add spices: Experiment with spices like garlic powder or smoked paprika for extra flavor.
  • Consider your vessel: Serve on a bed of greens, in a wrap, or as a sandwich for variety.
  • Fresh is best: Use the freshest ingredients you can find for a vibrant taste.
  • Make it a meal: Pair with quinoa or brown rice for a complete meal.

Common Mistakes and Troubleshooting

A few pitfalls to avoid when making your chicken salad:

  • Overmixing: Gently fold ingredients together to keep the chicken tender.
  • Skipping the chill: Donโ€™t skip refrigerating the salad; it makes a significant difference in flavor.
  • Using dry chicken: Ensure your chicken is moist. Adding a bit of extra yogurt can help if itโ€™s dry.
  • Too much dressing: Start with less dressing and add more as needed to avoid a soggy salad.

Delicious Variations

Want to mix things up? Here are four tasty variations to try:

  • Mexican Chicken Salad: Add black beans, corn, avocado, and lime juice for a fiesta in a bowl.
  • Curried Chicken Salad: Stir in curry powder and diced apples for a sweet and savory twist.
  • Greek Chicken Salad: Incorporate feta cheese, olives, and cucumber for a Mediterranean flavor.
  • Fruit-Infused Chicken Salad: Toss in grapes or diced apples for a touch of sweetness.

Storage and Make-Ahead Instructions

This Healthy Chicken Salad is perfect for meal prep! Hereโ€™s how to store it:

  • Refrigerate: Store in an airtight container in the fridge for up to 4 days.
  • Freeze: For longer storage, freeze the chicken salad (without nuts) for up to 3 months. Thaw and add nuts before serving.
  • Make it ahead: Prepare the salad up to 2 days in advance for easy meal planning.

Frequently Asked Questions

Here are answers to some common questions about this delicious dish:

  • Can I use canned chicken? Yes, canned chicken works in a pinch, but fresh cooked chicken is preferred for flavor and texture.
  • Is this recipe gluten-free? Yes, as long as you use gluten-free mayonnaise.
  • How can I make it dairy-free? Substitute yogurt with a non-dairy yogurt alternative.
  • Can I add fruits to the salad? Absolutely! Apples, grapes, or dried cranberries can add a nice sweetness.
  • What can I serve it with? Serve over greens, in wraps, or with whole grain crackers for a balanced meal.
  • How do I make it spicier? Add chopped jalapeรฑos or a dash of hot sauce for some heat.
  • Can I make it vegetarian? Replace chicken with chickpeas or tofu for a hearty vegetarian option.
  • Whatโ€™s the best way to chop chicken? Use a sharp knife and chop into uniform pieces for even mixing.

Nutritional Tips and Dietary Adaptations

Tailor this chicken salad to fit your dietary needs:

  • High Protein: This salad is already a protein-packed option thanks to the chicken and yogurt.
  • Low Carb: Skip the mayo for a lower-carb version and use more yogurt instead.
  • Rich in Fiber: Add additional vegetables like spinach or bell peppers for more fiber.
  • Heart-Healthy: Use avocado oil mayo and nuts for healthy fats.

Essential Equipment

Hereโ€™s what youโ€™ll need to prepare this chicken salad:

  • Cutting board: For chopping your ingredients.
  • Sharp knife: A good knife is essential for easy chopping.
  • Mixing bowl: A medium bowl is perfect for combining your salad.
  • Measuring cups: For accurate ingredient measurements.
  • Spoon: For mixing and serving.

Serving Suggestions

Enhance your chicken salad experience with these serving ideas:

  • On a bed of greens: Serve over a mix of spinach, arugula, or romaine for added nutrients.
  • In a wrap: Use whole grain or lettuce wraps for a portable meal.
  • As a sandwich: Enjoy it between slices of whole wheat bread for a classic lunch.
  • With crackers: Pair with whole grain crackers for a crunchy side.

Conclusion

Creating a Healthy Chicken Salad doesnโ€™t have to be complicated. With simple ingredients and a few tips, you can whip up a meal thatโ€™s not only delicious but also nourishing. Remember, cooking is about enjoying the process, so feel free to experiment with flavors and textures. I hope this recipe inspires you to make healthy eating a joyful part of your everyday life. Happy cooking!

Healthy Chicken Salad

Prep Time 15 minutes
Cook Time 10 minutes
Total Time 25 minutes
Servings 4 servings
Calories 350
A nutritious and flavorful chicken salad perfect for a quick lunch or light dinner. Packed with fresh herbs, nuts, and creamy yogurt dressing.

Ingredients

Protein

  • 1 pound cooked chicken (cubed) ((3 cups))
  • 3/4 cup celery stalks (diced) ((3 large))
  • 1/4 cup red onion (finely chopped)
  • 1/4 cup parsley or dill (finely chopped) (optional)
  • 1 cup pecans, almonds or cashews
  • 1/2 cup plain yogurt (2+% fat)
  • 1/4 cup mayo (avocado oil mayo)
  • 2 teaspoons Dijon mustard
  • 1 teaspoon any vinegar (except balsamic)
  • 1/2 teaspoon salt
  • to taste ground black pepper

Instructions 

  • Toast pecans in a skillet until fragrant, then cool and chop coarsely.
  • Mix toasted pecans, chicken, celery, onion, herbs, yogurt, mayo, mustard, vinegar, salt, and pepper in a bowl.
  • Refrigerate for at least 2 hours before serving.
  • Serve with greens, grains, or as a sandwich.

Notes

Adjust salt and pepper to taste for best flavor.
Calories: 350kcal
Cost: $15
Course: Salad
Cuisine: American
Keyword: Chicken

Welcome to your new favorite quick meal! This high protein chicken salad is designed for those busy weeknights when you need something nutritious, delicious, and quick. With the flexibility to use canned chicken or rotisserie chicken, this recipe ensures you can whip it up in no time, making healthy eating feel like a breeze. Packed with flavor and nutrition, itโ€™s the perfect solution for anyone looking to enjoy balanced meals without the fuss.

Why Youโ€™ll Love This Recipe

  • Quick and Easy: This recipe takes just 15 minutes to prepare, making it ideal for busy schedules.
  • High Protein: With protein-rich ingredients like chicken and Greek yogurt, itโ€™s a filling meal that keeps you satisfied.
  • Versatile Ingredients: Use what you have on handโ€”whether itโ€™s canned chicken or rotisserie chicken, this salad is flexible.
  • Meal Prep Friendly: Make this salad ahead of time and store it for up to five days, perfect for weekly meal prep.
  • Delicious Variations: Customize your salad with different flavors or additional ingredients to keep it exciting!

Ingredients Breakdown

This high protein chicken salad features a mix of essential ingredients that create a creamy, flavorful dish. Hereโ€™s what youโ€™ll need:

  • 1.5 cups shredded cooked chicken: You can use a 12.5 oz can of chicken or leftover rotisserie chicken for convenience.
  • 1 can white beans: Drained and rinsed, beans add extra protein and creaminess.
  • 1/4 cup diced onions: Regular or green onions work well for added flavor.
  • 1/4 cup diced celery: This gives a nice crunch and freshness.
  • 1/3 cup Greek yogurt: A healthier alternative that boosts protein content. You can substitute with regular yogurt if needed.
  • 2 tablespoons mayonnaise: For creaminess, but feel free to adjust or omit for a lighter version.
  • 2 teaspoons Dijon mustard: Adds a tangy flavor profile that enhances the overall taste.
  • 1 teaspoon lemon juice: Fresh juice or apple cider vinegar will brighten the flavors.
  • 1/2 teaspoon curry powder: This adds a unique twist, but adjust to your taste.
  • 1/4 teaspoon salt and black pepper: Season to taste, adjusting as needed.
  • 1/8 teaspoon garlic powder: For an extra layer of flavor.
  • 1/8 teaspoon cayenne (optional): If you like a kick, this is a nice addition.
  • 4 whole-wheat tortillas or lettuce leaves: Use these to wrap the chicken salad for a fantastic meal.
  • 1 cup lettuce: Spring mix or spinach works well for serving.
  • 1 large avocado (optional): Adds creaminess and healthy fats; consider using if you want to elevate the dish.

Expert Tips for Perfecting Your Chicken Salad

Creating the ideal chicken salad is all about the details. Here are some expert tips to ensure your dish turns out perfectly every time:


Meal Prep Containers

โ˜… Recommended Kitchen Tool

Meal Prep Containers

Make this recipe even easier with a quality Meal Prep Containers โ€” a must-have kitchen staple!


๐Ÿ›’ Shop This Tool โ†’

As an Amazon Associate, we earn from qualifying purchases.
  • Mix your flavors: Donโ€™t be afraid to add herbs or spices that resonate with you. Fresh dill or cilantro can add a refreshing twist.
  • Adjust the creaminess: If you prefer a thicker salad, add more Greek yogurt or mayonnaise until you reach your desired consistency.
  • Keep it fresh: Add fresh vegetables like bell peppers or cucumbers for extra crunch and nutrition, making the salad even more vibrant.
  • Experiment with dressings: Try different dressings or add-ins like pesto or vinaigrette for a completely different flavor.
  • Consider texture: Balance creamy with crunchy by adding nuts or seeds for extra texture and healthy fats.
  • Make it colorful: Incorporate various vegetables to enhance both the visual appeal and nutrient diversity of your salad.
  • Taste as you go: Always taste your salad before serving, adjusting seasoning to ensure itโ€™s just right for your preferences.
  • Let it chill: For enhanced flavors, let the salad sit in the fridge for at least 30 minutes before serving to allow the flavors to meld.

Common Mistakes and Troubleshooting

Close-up of a high protein chicken salad made with canned chicken and fresh ingredients.

Even the best cooks can make mistakes! Here are some common pitfalls to avoid when making your chicken salad:

  • Too dry: If your salad feels dry, add a bit more Greek yogurt or mayonnaise to enhance the texture.
  • Over-seasoning: Be cautious with salt and spices; you can always add more, but itโ€™s hard to fix an overly seasoned dish.
  • Not enough flavor: If it lacks depth, consider adding more mustard, lemon juice, or spices to elevate the flavor profile.
  • Wrong texture: If the salad is too mushy, reduce the amount of Greek yogurt or add in more crunchy ingredients.

Delicious Variations

Feeling adventurous? Here are some scrumptious variations to keep your chicken salad exciting:

  • Buffalo Chicken Salad: Substitute hot sauce for the mustard and add crumbled blue cheese for a spicy kick.
  • Greek Chicken Salad: Add feta, olives, and chopped tomatoes, replacing the curry powder with oregano.
  • Southwestern Chicken Salad: Mix in black beans, corn, and diced bell peppers, topped with a lime vinaigrette.
  • Curried Chicken Salad: Increase the curry powder and add raisins or diced apples for a sweet touch.

Storage and Make-Ahead Instructions

This chicken salad is perfect for meal prep! Hereโ€™s how to store it properly:

  • Refrigeration: Store the chicken salad in an airtight container in the fridge for up to five days.
  • Make-Ahead: Prepare the chicken salad mixture in advance, but assemble wraps or serve over greens just before eating for the best texture.
  • Freezing: While not ideal for freezing, you can store the chicken mixture in the freezer for up to three months. Thaw in the fridge before serving.

Comprehensive FAQ

Here are some frequently asked questions about this chicken salad:

  • Can I use frozen chicken? Yes, cooked frozen chicken can be used. Just ensure itโ€™s properly thawed beforehand.
  • What if I donโ€™t have Greek yogurt? You can substitute regular yogurt, but keep in mind it will lower the protein content.
  • Is this salad low-carb? Yes, if you serve it in lettuce wraps instead of tortillas, itโ€™s a great low-carb option.
  • Can I add fruits to my chicken salad? Absolutely! Grapes, apples, or dried cranberries add a lovely sweetness.
  • What can I serve with this salad? It pairs well with whole grain crackers, veggie sticks, or a side of fruit.
  • How can I make this vegan? Substitute the chicken with chickpeas and use a vegan yogurt or mayo alternative.
  • Can I use other types of beans? Yes, black beans or kidney beans are great alternatives!
  • How spicy can I make it? Adjust the cayenne to your taste, or add diced jalapeรฑos for an extra kick!

Nutritional Tips and Dietary Adaptations

This chicken salad is not just delicious; it’s also adaptable to fit various dietary needs:

  • Low-Carb: Opt for lettuce wraps instead of tortillas and keep added sugars low.
  • High Fiber: Incorporate additional beans or add fiber-rich vegetables like bell peppers and carrots.
  • Gluten-Free: Ensure your tortillas are certified gluten-free or enjoy it as a salad.
  • Lower Fat: Use less mayonnaise and opt for a higher ratio of Greek yogurt.

Essential Equipment Recommendations

To make this chicken salad, youโ€™ll need some basic kitchen tools:

  • Mixing Bowls: A medium bowl for the chicken mixture and a small bowl for the dressing.
  • Measuring Cups and Spoons: For precise ingredient measurements.
  • Cutting Board and Knife: To chop your vegetables and ingredients quickly.
  • Spoon or Spatula: For mixing everything together thoroughly.

Serving Suggestions

Make your meal even more enjoyable with these serving ideas:

  • As a Wrap: Use whole wheat tortillas or lettuce leaves to wrap the chicken salad for easy eating.
  • On a Bed of Greens: Serve the salad over mixed greens or spinach for added nutrients.
  • As a Dip: Pair with whole grain crackers or vegetable sticks for a fun and healthy snack.
  • In a Sandwich: Use whole grain or gluten-free bread to create a delicious sandwich option.

In conclusion, making this high protein chicken salad is not just a meal; itโ€™s a celebration of simplicity and nutrition. With endless variations and the ability to meal prep, it fits seamlessly into any busy lifestyle. So go ahead, give it a try, and enjoy the delightful balance of flavors and textures that make healthy eating feel so rewarding!

Quick High Protein Chicken Salad Recipe with Canned Chicken

Prep Time 10 minutes
Total Time 10 minutes
Servings 4 servings
Calories 350
A quick and protein-packed chicken salad perfect for wraps or lettuce cups, using simple ingredients and easy steps.

Ingredients

Protein and Vegetables

  • 1.5 cups shredded cooked chicken (a 12.5 oz can or rotisserie chicken)
  • 1 can white beans (drained)
  • 0.25 cup diced onions (or sliced green onions)
  • 0.25 cup diced celery (about 1 rib)
  • 0.33 cup Greek yogurt (or regular)
  • 2 tablespoons mayonnaise
  • 2 teaspoons Dijon mustard
  • 1 teaspoon lemon juice (or apple cider vinegar)
  • 0.5 teaspoon curry powder
  • 0.25 teaspoon salt (or to taste)
  • 0.25 teaspoon black pepper
  • 0.125 teaspoon garlic powder
  • 0.125 teaspoon cayenne (optional)
  • 4 9-inch whole-wheat tortillas (or lettuce leaves for low carb)
  • 1 cup lettuce (spring mix or spinach)
  • 1 large avocado (optional)

Instructions 

  • Add chicken, beans, onions, and celery to a bowl.
  • Mix yogurt, mayonnaise, mustard, lemon juice, salt, pepper, curry powder, and garlic powder in a small bowl. Combine with chicken mixture.
  • Serve over lettuce, as a dip, or in wraps. For wraps, spread mashed avocado on tortillas, add greens, and top with chicken salad. Roll up and serve.
  • For lettuce wraps, place chicken salad in large lettuce leaves and fold to eat.
  • Store the chicken salad in the refrigerator for up to 5 days before assembling wraps.

Notes

You can customize with additional vegetables or herbs for extra flavor.
Calories: 350kcal
Cost: $10
Course: Salad
Cuisine: American
Keyword: Chicken, High Protein

Discover the Joy of Easy Sheet Pan Dinners

If you’re on the lookout for a quick and nourishing meal solution that fits into your busy life, you’ve come to the right place! Sheet pan dinners are a game-changer for weeknight meals, combining convenience with deliciousness. In this guide, we will explore the ins and outs of creating an easy sheet pan dinner that is not only satisfying but also healthy, using minimal ingredients and cleanup. Letโ€™s dive into why this cooking method is perfect for you!

Why You’ll Love This Recipe

Sheet pan dinners offer a multitude of benefits that make them an ideal choice for any home cook:

  • Minimal Cleanup: Cooking everything on one pan means less time scrubbing dishes after dinner.
  • Flexibility: You can mix and match proteins and vegetables based on what you have at home.
  • Flavorful Results: Roasting brings out the natural sweetness of vegetables and enhances the taste of proteins.
  • Easy to Scale: Whether cooking for one or a family, you can easily adjust portions.
  • Balanced Meal: Each sheet pan dinner can include protein, veggies, and healthy fats, ensuring a well-rounded meal.

Ingredient Breakdown

A successful sheet pan dinner starts with quality ingredients. Hereโ€™s what youโ€™ll need:


Professional Chef Knife Set

โ˜… Recommended Kitchen Tool

Professional Chef Knife Set

Make this recipe even easier with a quality Professional Chef Knife Set โ€” a must-have kitchen staple!


๐Ÿ›’ View on Amazon โ†’

As an Amazon Associate, we earn from qualifying purchases.
  • Protein: 1.5 pounds of boneless, skinless chicken thighs or breasts, salmon fillets, or large shrimp.
  • Vegetables: 1 pound of baby potatoes, halved, 2 cups of broccoli florets, and 1 large bell pepper, sliced.
  • Aromatics: 1 small red onion, sliced, and 4 cloves of garlic, minced.
  • Oils and Seasonings: 3 tablespoons of olive oil, 1 teaspoon of paprika, 1 teaspoon of dried oregano, 1/2 teaspoon of garlic powder, salt, and black pepper to taste.
  • Garnish: 2 tablespoons of freshly chopped parsley and 1 lemon, cut into wedges.

Pro Tips for Perfect Sheet Pan Dinners

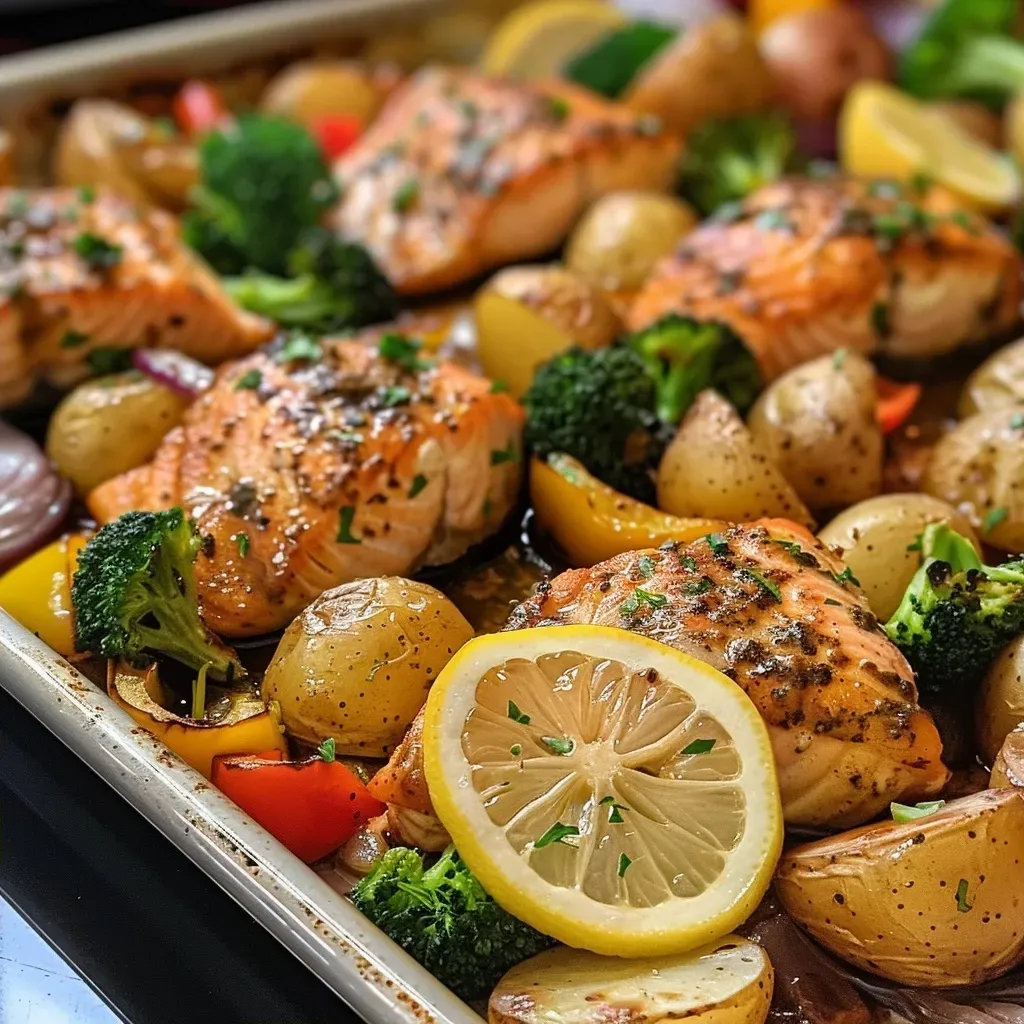
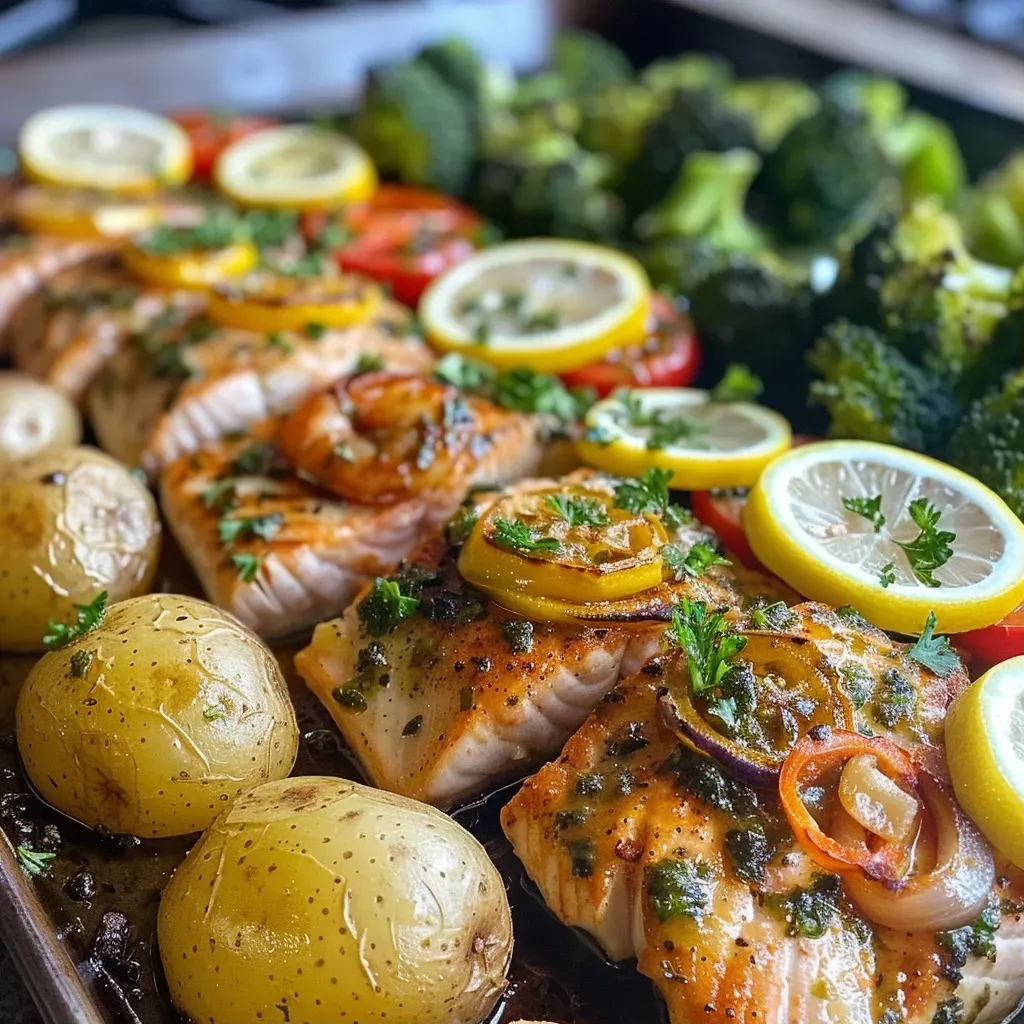
Close-up view of a colorful sheet pan dinner featuring chicken, baby potatoes, and broccoli.

To make the most of your sheet pan meal, consider these expert tips:

  • Preheat Properly: Always preheat your oven to 425ยฐF (220ยฐC) to ensure even cooking.
  • Donโ€™t Overcrowd the Pan: Give each ingredient space to roast; use two pans if necessary.
  • Layer Wisely: Start with denser vegetables like potatoes and carrots before adding quicker-cooking ones.
  • Use Quality Ingredients: Fresh vegetables and good-quality protein make a significant difference in taste.
  • Experiment with Spices: Feel free to switch up spices based on your preferences, like adding cumin or chili powder for a kick.
  • Check for Doneness: Use a meat thermometer to ensure proteins reach safe cooking temperatures.
  • Allow for Resting: Let your meal sit for a few minutes before serving to enhance flavors.
  • Incorporate Seasonal Produce: Utilize seasonal fruits and vegetables for the best flavor and nutrition.

Common Mistakes and Troubleshooting

Even the best cooks make mistakes! Here are some common issues and how to avoid them:

  • Burnt Vegetables: If your veggies are browning too quickly, lower the oven temperature slightly.
  • Undercooked Protein: Ensure all pieces are of similar size for even cooking.
  • Flavorless Dish: Season generously! Donโ€™t shy away from salt, pepper, and herbs.
  • Sticky Ingredients: If using honey or syrup, mix it with oil to prevent sticking.

Variations to Try

Once you master the basic sheet pan dinner, explore these delicious variations:

  • Asian-Inspired Sheet Pan Dinner: Swap chicken for tofu and add bok choy, snap peas, and sesame oil.
  • Italian Sausage and Veggies: Use Italian sausage, zucchini, and cherry tomatoes, seasoning with basil and oregano.
  • Mexican Chicken Fajitas: Use chicken strips with bell peppers and onions, seasoned with cumin and chili powder.
  • Mediterranean Delight: Combine shrimp with bell peppers, zucchini, and a sprinkle of feta cheese.

Storage and Make-Ahead Instructions

Sheet pan dinners are perfect for meal prep! Hereโ€™s how to store them:

  • Refrigeration: Store leftovers in an airtight container for up to 3 days.
  • Freezing: Freeze cooked leftovers for up to 2 months; reheating in the oven works best for texture.
  • Make-Ahead: Prep your ingredients the night before and store them in the fridge; just toss them on the pan when ready to cook.

Frequently Asked Questions

Here are some questions people often ask about sheet pan dinners:

  • Can I use frozen vegetables? Yes, but they may release more moisture, so adjust cooking time accordingly.
  • What if I donโ€™t have a sheet pan? Any large, oven-safe baking dish will work!
  • How do I know when my chicken is done? Chicken should reach an internal temperature of 165ยฐF (75ยฐC).
  • Can I make it vegetarian? Absolutely! Use hearty vegetables and plant-based proteins like tempeh or chickpeas.
  • Whatโ€™s the best way to serve it? A squeeze of fresh lemon juice brightens the flavors just before serving.
  • How can I add more flavor? Marinate your protein beforehand for extra depth of flavor.
  • Whatโ€™s the ideal oven temperature? 425ยฐF (220ยฐC) is perfect for achieving crispy results.
  • Can I use a different oil? Yes, avocado oil or sesame oil are great alternatives.

Nutrition Tips and Dietary Adaptations

To make your sheet pan dinner even healthier, consider these adaptations:

  • Whole Grains: Serve with quinoa or brown rice for added fiber.
  • Low-Sodium Options: Use low-sodium broth or soy sauce to control salt intake.
  • Gluten-Free: Most ingredients are naturally gluten-free; just watch for sauces.
  • Plant-Based: Replace meat with legumes or tofu to create a fulfilling vegan meal.

Essential Equipment Recommendations

Having the right tools makes cooking easier! Hereโ€™s what you need:

  • Quality Sheet Pan: A sturdy, non-stick sheet pan helps achieve even roasting.
  • Mixing Bowls: For tossing ingredients and mixing seasonings.
  • Meat Thermometer: Ensures your proteins are cooked to perfection.
  • Spatula: For flipping and serving your delicious meal.

Serving Suggestions

Pair your sheet pan dinner with these delightful sides:

  • Simple Green Salad: A fresh salad with a light vinaigrette balances the meal.
  • Whole Grain Bread: Serve with crusty bread to mop up any juices.
  • Quinoa or Brown Rice: Add a wholesome grain for a more filling meal.
  • Yogurt Sauce: A dollop of tzatziki or yogurt adds creaminess and tang.

Conclusion

Incorporating an easy sheet pan dinner into your weekly meal rotation can simplify your cooking process while delivering delicious and balanced meals. With a little planning and creativity, you’ll find that these meals can become a favorite in your home. So gather your ingredients, preheat that oven, and enjoy the warmth of a home-cooked meal without all the stress. Happy cooking!

Easy Sheet Pan Dinner

Prep Time 10 minutes
Cook Time 30 minutes
Total Time 40 minutes
Servings 4 servings
Calories 450
A simple and delicious one-pan meal perfect for weeknights, combining protein and vegetables roasted to perfection.

Ingredients

Protein

  • 1.5 pounds boneless, skinless chicken thighs or breasts, salmon fillets, or large shrimp (Choose your preferred protein)
  • 1 pound baby potatoes, halved
  • 2 cups broccoli florets
  • 1 large bell pepper, sliced
  • 1 small red onion, sliced
  • 4 cloves garlic, minced
  • 3 tablespoons olive oil
  • 1 teaspoon paprika
  • 1 teaspoon dried oregano
  • 0.5 teaspoon garlic powder
  • to taste Salt and black pepper
  • 2 tablespoons freshly chopped parsley
  • 1 whole lemon, cut into wedges

Instructions 

  • Preheat oven to 425ยฐF (220ยฐC). Chop vegetables and pat protein dry.
  • Toss denser vegetables and half of the oil and seasonings; spread on a baking sheet.
  • Roast for 15 minutes. Toss remaining vegetables and protein with rest of oil and seasonings.
  • Add protein and remaining vegetables to the pan; bake for another 15-20 minutes.
  • Serve with lemon wedges and garnish with parsley.

Notes

Use quick-cooking proteins like shrimp during the last 8-10 minutes for best results.
Calories: 450kcal
Cost: $15
Course: dinner
Cuisine: American
Keyword: easy, healthy, sheet pan

Elevate Your Weeknight Dinners with Lemon Herb Chicken and Asparagus

Weeknight dinners can often feel like a chore, but they donโ€™t have to be! If youโ€™re searching for a quick, nutritious, and absolutely delicious meal, look no further than this Bright and Easy Lemon Herb Chicken with Asparagus. Bursting with flavor and essential nutrients, this dish embodies the principles of clean eating while still being enjoyable and satisfying. In this comprehensive guide, weโ€™ll explore why this recipe is a game-changer for your busy weeknights, along with handy tips, variations, and everything you need to know to make it a staple in your home.

Letโ€™s unlock the secrets to creating healthy, clean dinners that fit into your lifestyle without the fuss. With minimal prep and cooking time, you can enjoy a meal thatโ€™s not only good for you but also a joy to eat. So, roll up your sleeves, and letโ€™s dive into this delightful recipe!

Why Youโ€™ll Love This Lemon Herb Chicken with Asparagus

Here are five compelling reasons why this dish will become a favorite in your kitchen:


Air Fryer XL

โ˜… Recommended Kitchen Tool

Air Fryer XL

Make this recipe even easier with a quality Air Fryer XL โ€” a must-have kitchen staple!


๐Ÿ›’ View on Amazon โ†’

As an Amazon Associate, we earn from qualifying purchases.
  • Quick and Easy: This recipe takes just 30 minutes from start to finish, making it ideal for busy weeknights when time is of the essence.
  • One-Pan Wonder: Minimal cleanup is required! Youโ€™ll only need one baking sheet, which means less time scrubbing pots and more time enjoying your meal.
  • Flavor-Packed: The combination of fresh herbs, lemon zest, and garlic infuses the chicken and asparagus with a bright flavor thatโ€™s sure to impress.
  • Nutrient-Rich: Packed with protein from the chicken and vitamins from the asparagus, this meal supports your overall health while satisfying your taste buds.
  • Customizable: This recipe is versatile! You can easily swap out ingredients and adjust flavors to suit your preferences or dietary needs.

Ingredients Youโ€™ll Need

To create this delightful dish, gather the following ingredients:

  • 2 pounds boneless skinless chicken breasts: About 4 pieces. Look for chicken that is of uniform thickness for even cooking.
  • 2 tsp Herbs de Provence: A fragrant blend of herbs that adds depth to the dish. If you donโ€™t have it on hand, feel free to substitute with Italian seasoning.
  • 1 clove garlic, minced: Fresh garlic enhances the dish with a savory aroma and taste.
  • 2 tbsp olive oil: A healthy fat that aids in cooking and flavor development.
  • 1 tbsp honey or maple syrup: Adds a hint of sweetness to balance the acidity of the lemon.
  • 1 tbsp lemon zest: Brightens the dish and adds a citrusy aroma.
  • ยผ cup freshly squeezed lemon juice: The star ingredient that provides acidity and brightness.
  • 2 tsp sea salt: To taste, essential for enhancing the flavors of the dish.
  • ยฝ tsp freshly ground black pepper: Adds a gentle heat and flavor.
  • 1.5 pounds asparagus: Trimmed, this vegetable adds texture and nutrients. You can substitute with green beans or broccoli if desired.
  • 1 lemon, cut into thin slices: For garnish and an extra burst of flavor.

Step-by-Step Instructions

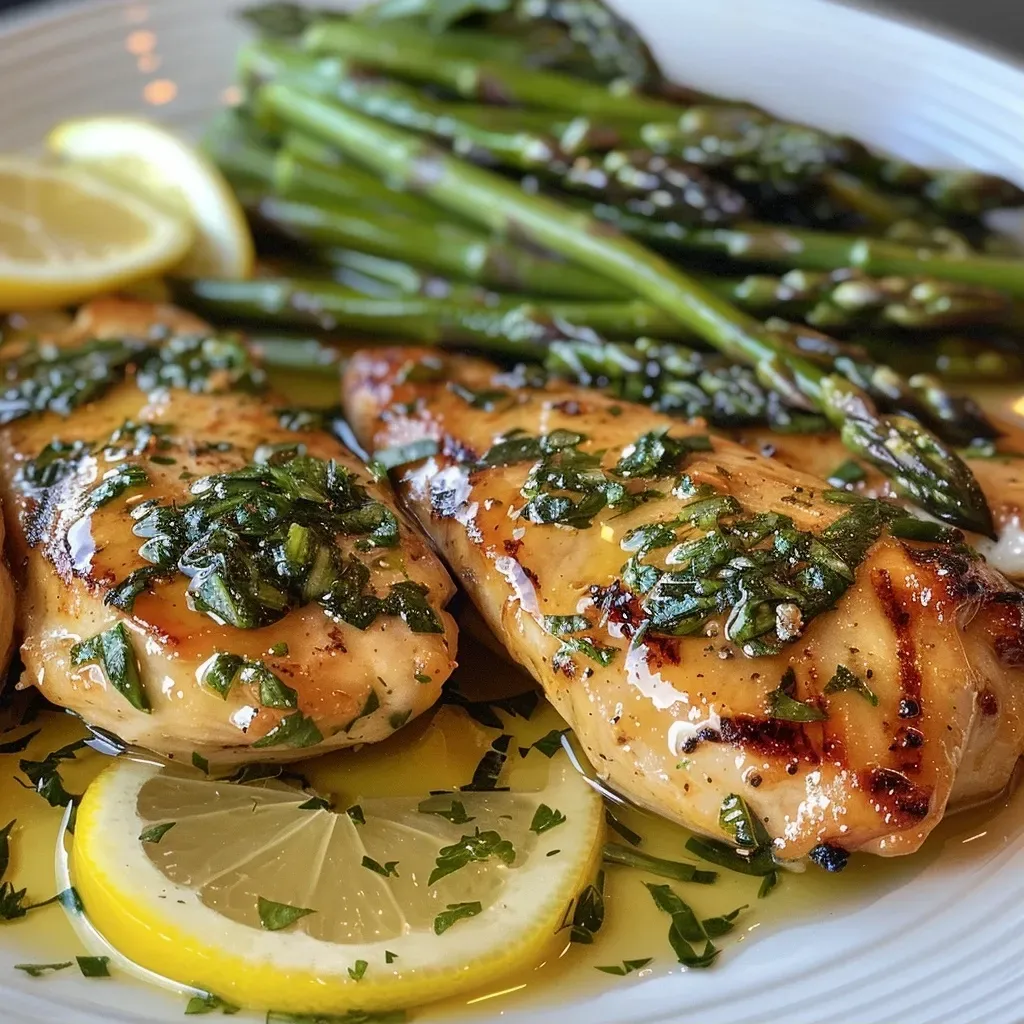
Close-up view of juicy lemon herb chicken alongside fresh asparagus.

Follow these easy steps to whip up your Lemon Herb Chicken with Asparagus:

  1. Preheat the oven to 400ยฐF and line a baking sheet with parchment paper to prevent sticking.
  2. Place the chicken breasts evenly spaced on the prepared baking sheet and set aside.
  3. In a small bowl, whisk together the Herbs de Provence, minced garlic, olive oil, honey (or maple syrup), lemon zest, lemon juice, sea salt, and pepper until well combined.
  4. Pour half of the herb mixture over the chicken breasts, ensuring even coverage. Bake in the oven until the chicken is almost done, about 20 minutes.
  5. While the chicken is cooking, toss the remaining herb mixture with the trimmed asparagus and set aside.
  6. Remove the chicken from the oven and switch the oven to the broil setting. Arrange the seasoned asparagus around the edges of the pan.
  7. Pour any remaining sauce from the asparagus over the entire pan, and place lemon slices in and around the chicken and asparagus for extra flavor.
  8. Broil on low setting until asparagus is crisp-tender and chicken is golden brown with no pink in the center, about 10 minutes.
  9. Remove from the oven and serve immediately while hot.

Pro Tips for Perfect Lemon Herb Chicken

Enhance your cooking game with these expert insights:

  • Choose Quality Chicken: Opt for organic or free-range chicken when possible for better flavor and texture.
  • Marinate for Flavor: If you have extra time, marinate the chicken in the herb mixture for at least 30 minutes before cooking to deepen the flavors.
  • Donโ€™t Overcrowd the Pan: Ensure that the chicken and asparagus are spread out evenly on the baking sheet for even cooking.
  • Check Temperature: Use a meat thermometer to ensure the chicken reaches an internal temperature of 165ยฐF for safety.
  • Let it Rest: Allow the chicken to rest for a few minutes after cooking to retain its juices.
  • Fresh Herbs Matter: Fresh herbs can elevate the dish, so consider using fresh parsley or thyme as a garnish.
  • Experiment with Seasoning: Donโ€™t hesitate to adjust the seasoning according to your taste preferencesโ€”more salt, pepper, or even a pinch of red pepper flakes will add a kick!
  • Serve Immediately: This dish is best enjoyed fresh out of the oven, so have your sides ready to go before serving.

Common Mistakes and Troubleshooting

Even the best chefs can make mistakes! Here are some common pitfalls and how to avoid them:

  • Overcooked Chicken: Keep an eye on the chicken as it cooks. Use a meat thermometer to avoid dryness.
  • Undercooked Asparagus: If the asparagus isnโ€™t tender enough, return the pan to the oven for a few more minutes of cooking.
  • Too Much Sauce: If you find the dish too saucy, reduce the amount of sauce used on the chicken or asparagus next time.
  • Flavorless Chicken: If you skip seasoning or marinating, the chicken may taste bland. Emphasize seasoning for vibrant flavor.

Healthy Variations to Try

Feel free to get creative with this recipe! Here are some delicious variations:

  • Herb-Infused Chicken: Experiment with different herbs like rosemary or thyme for a twist on flavor.
  • Vegetarian Option: Replace chicken with chickpeas or tofu for a plant-based version thatโ€™s equally satisfying.
  • Spicy Version: Add red pepper flakes or chopped jalapeรฑos to the herb mixture for a spicy kick.
  • Grain Bowl: Serve the chicken and asparagus over a bed of brown rice, quinoa, or farro for a complete meal.

Storage and Make-Ahead Instructions

This meal is perfect for meal prep! Hereโ€™s how to store and reheat:

  • Refrigerate: Store leftovers in an airtight container in the fridge for up to 3 days.
  • Freeze: You can freeze cooked chicken and asparagus for up to 2 months. Just ensure they cool completely before freezing.
  • Reheat: Reheat in the oven at 350ยฐF until warmed through, or use the microwave for a quicker option.

Frequently Asked Questions

Here are some common questions regarding this recipe:

  • Can I use chicken thighs instead of breasts? Yes! Chicken thighs will add more flavor and moisture, although cooking times may vary slightly.
  • Is this recipe gluten-free? Absolutely! All ingredients used are naturally gluten-free.
  • What can I serve with this dish? Consider pairing it with a light salad, quinoa, or roasted sweet potatoes for a balanced meal.
  • Can I use frozen asparagus? Fresh asparagus is recommended, but if using frozen, reduce cooking time as it may become mushy.
  • How can I make this dish dairy-free? This recipe is naturally dairy-free, so youโ€™re all set!
  • Can I prepare the chicken ahead of time? Yes, you can marinate the chicken up to 24 hours in advance for maximum flavor.
  • What if I donโ€™t have lemons? Lime juice is a great substitute if youโ€™re out of lemons.
  • Is this recipe suitable for meal prep? Definitely! This dish reheats well and makes for convenient lunches during the week.

Nutrition Tips and Dietary Adaptations

For those looking to tailor this recipe to specific dietary needs, here are some tips:

  • Low-Carb: Serve the chicken and asparagus as is or over a bed of cauliflower rice for a low-carb option.
  • Paleo-Friendly: Stick to the original recipe but ensure that your honey or maple syrup is pure and organic.
  • Whole30 Approved: Omit the honey or maple syrup to keep it compliant with Whole30 guidelines.
  • Heart-Healthy: Use skinless chicken and watch the amount of olive oil to keep the dish light.

Essential Kitchen Equipment

Hereโ€™s what youโ€™ll need to get started:

  • Baking Sheet: A sturdy sheet to hold all ingredients while they roast.
  • Parchment Paper: For easy cleanup and to prevent sticking.
  • Whisk: To mix the marinade thoroughly.
  • Meat Thermometer: To ensure the chicken is cooked to perfection.

Serving Suggestions

This Lemon Herb Chicken pairs beautifully with a variety of side dishes. Here are a few ideas:

  • Quinoa Salad: A light salad with quinoa, cucumbers, and a lemon vinaigrette complements the dish perfectly.
  • Roasted Sweet Potatoes: Their natural sweetness contrasts nicely with the lemon and herbs.
  • Garlic Bread: Serve alongside some crusty garlic bread for a comforting addition.
  • Light Soup: A refreshing cucumber or tomato soup can be a great appetizer before the main course.

With these tips and this delightful recipe, youโ€™re well on your way to making weeknight dinners an enjoyable and healthy experience. Remember, healthy eating should feel good, not like a chore. So, gather your ingredients, embrace the process, and enjoy every bite of your Lemon Herb Chicken with Asparagus!

Lemon Herb Chicken with Asparagus

Prep Time 10 minutes
Cook Time 30 minutes
Total Time 40 minutes
Servings 4 servings
Calories 350
A flavorful and healthy dish featuring tender chicken breasts and crisp asparagus, infused with fresh lemon and herbs.

Ingredients

Protein

  • 2 pounds boneless skinless chicken breasts (about 4 pieces)
  • 2 tsp Herbs de Provence
  • 1 clove garlic, minced
  • 2 tbsp olive oil
  • 1 tbsp honey or maple syrup
  • 1 tbsp lemon zest
  • ยผ cup freshly squeezed lemon juice (from 1 lemon)
  • 2 tsp sea salt (or to taste)
  • ยฝ tsp freshly ground black pepper
  • 1.5 pounds asparagus (trimmed)
  • 1 lemon lemon slices (for garnish)

Instructions 

  • Preheat oven to 400ยฐF (200ยฐC). Place chicken on a baking sheet.
  • Mix herbs, garlic, oil, honey, lemon zest, juice, salt, and pepper. Pour half over chicken.
  • Bake chicken for 20 minutes. Toss asparagus with remaining herb mixture.
  • Remove chicken, arrange asparagus around it, and pour remaining sauce. Add lemon slices.
  • Broil until asparagus is crisp-tender and chicken is golden, about 10 minutes. Serve hot.

Notes

For extra flavor, add fresh herbs or a squeeze of lemon before serving.
Calories: 350kcal
Cost: $15
Course: Main Course
Cuisine: American
Keyword: Asparagus, Chicken, Lemon

Discover the Joy of a Wholesome Pasta Salad

Welcome to a delightful journey into the world of healthy eating! This Healthy Pasta Salad recipe isnโ€™t just another dish; itโ€™s a celebration of fresh ingredients, vibrant colors, and satisfying flavors. Imagine a bowl brimming with colorful veggies, savory salami, and a zesty dressing that brings everything together. Perfect as a side dish or a light meal, this pasta salad is a versatile addition to your culinary repertoire. Letโ€™s dive into the specifics of why youโ€™ll love this recipe and how it can fit seamlessly into your busy lifestyle!

Why Youโ€™ll Love This Recipe

This Healthy Pasta Salad isn’t just easy to make; it also comes with numerous benefits that make it a go-to choice for any occasion:

  • Quick Preparation: Ready in under 30 minutes, this salad is perfect for busy weeknights or last-minute gatherings.
  • Customizable Ingredients: You can adjust the recipe based on what you have at home, making it flexible and budget-friendly.
  • Nutritious and Satisfying: Packed with veggies and protein, it keeps you full without feeling heavy.
  • Perfect for Meal Prep: Make it ahead of time and enjoy it throughout the weekโ€”just store in the fridge!
  • Great for Any Occasion: Whether itโ€™s a summer barbecue, a picnic, or a simple weeknight dinner, this salad fits right in.

Ingredient Breakdown with Substitutions

Understanding the ingredients is key to mastering this recipe. Hereโ€™s what youโ€™ll need, along with great options for substitutions:


Meal Prep Containers

โ˜… Recommended Kitchen Tool

Meal Prep Containers

Make this recipe even easier with a quality Meal Prep Containers โ€” a must-have kitchen staple!


๐Ÿ›’ See Deals on Amazon โ†’

As an Amazon Associate, we earn from qualifying purchases.
  • 15 oz fusilli pasta: You can substitute with whole grain or gluten-free pasta for a healthier option.
  • 1 cup mini mozzarella balls: If you prefer, you can omit the cheese or use feta for a different flavor.
  • 1ยฝ cups halved cherry tomatoes: Any seasonal tomato worksโ€”heirloom varieties add a unique taste.
  • ยผ cup diced red onion: Green onions or shallots can be used if you prefer a milder flavor.
  • 1 cup cucumber: You can substitute with bell peppers for extra crunch.
  • ยฝ cup black olives: Green olives work well if you like a tangier taste.
  • ยผ cup chopped parsley: Fresh basil or arugula can give a different herbal note.
  • ยฝ cup diced salami: For a vegetarian option, consider chickpeas or marinated tofu.
  • ยฝ cup diced red bell pepper: Feel free to swap in any color bell pepper.
  • Dried herbs and dressing ingredients: Adjust the herbs based on your taste; you can also use store-bought dressing if youโ€™re short on time.

How to Make the Healthy Pasta Salad

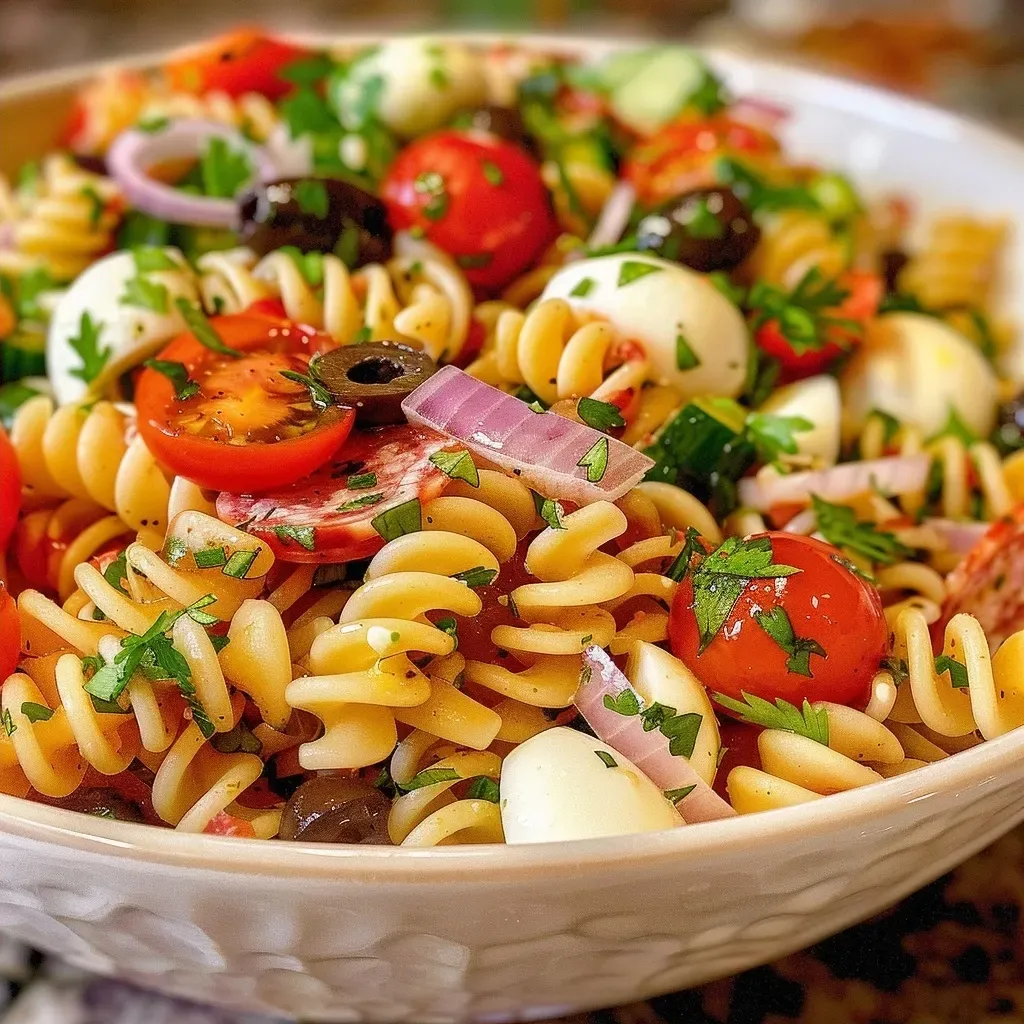
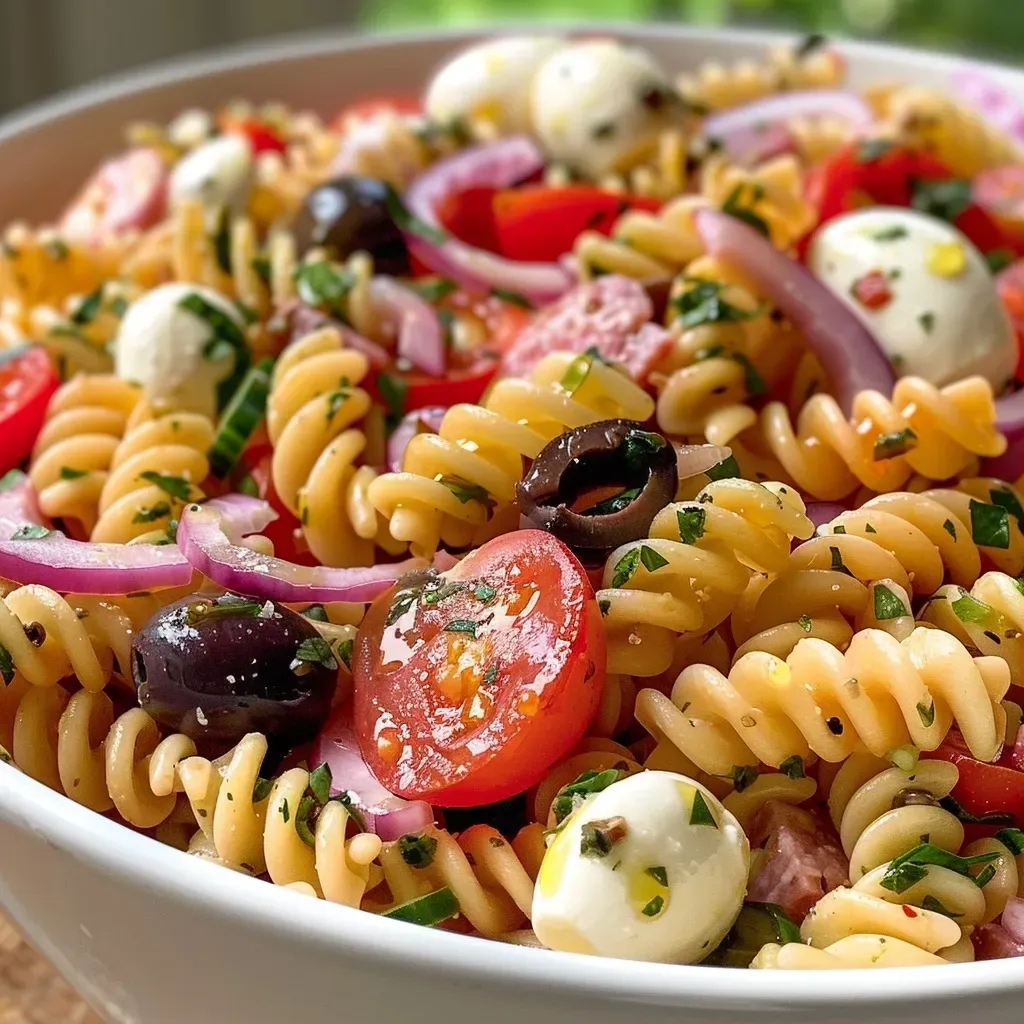
Close-up view of a colorful healthy pasta salad featuring fusilli noodles, mozzarella, cherry tomatoes, and olives.

Follow these simple steps to create your delicious pasta salad:

  1. Prepare pasta according to package directions, ensuring itโ€™s cooked al dente. Drain and rinse with cold water to stop the cooking process.
  2. While the pasta cooks, make the dressing: In a mason jar, combine dried thyme, oregano, lemon juice, olive oil, Dijon mustard, maple syrup, and black pepper. Shake well to emulsify.
  3. In a large mixing bowl, combine the cooled pasta with cut vegetables and salami.
  4. Pour the dressing over the salad and toss until everything is evenly coated.
  5. For the best flavor, cover and refrigerate for at least 1 hour before serving.

Expert Tips for Best Results

Here are some pro tips to elevate your pasta salad:

  • Use Fresh Ingredients: Fresh veggies not only taste better but also retain more nutrients.
  • Adjust Seasoning: Taste and adjust the dressing before serving to ensure itโ€™s just right for your palate.
  • Chill Well: Allowing the salad to chill helps the flavors meld beautifully.
  • Donโ€™t Overcook the Pasta: Al dente pasta holds up better in salads and prevents mushiness.
  • Mix and Match: Feel free to experiment with different herbs and spices to create your unique flavor profile.
  • Presentation Matters: Serve in a large bowl and garnish with fresh herbs for a beautiful touch.
  • Prep Ahead: This salad keeps well in the fridge, making it a perfect make-ahead meal.
  • Donโ€™t Skip the Dressing: The dressing is crucial for flavor; it brings all the ingredients together!

Common Mistakes and Troubleshooting

Even seasoned cooks can make mistakes! Here are some common issues and how to fix them:

  • Too Salty: If youโ€™ve overdone the salt, add more pasta or veggies to balance it out.
  • Dry Salad: If your salad seems dry, drizzle a bit more olive oil or dressing before serving.
  • Flavorless: If the salad lacks flavor, consider adding more herbs or a splash of vinegar to brighten it up.
  • Overcooked Pasta: If your pasta is mushy, be sure to cook according to package directions next time and rinse immediately.

Variations to Try

Looking to switch things up? Here are some delicious variations you can try:

  • Greek Pasta Salad: Substitute feta cheese, kalamata olives, and add cucumbers, red onions, and a splash of red wine vinegar.
  • Caprese Pasta Salad: Add fresh basil, cherry tomatoes, and mozzarella balls, drizzling with balsamic glaze for a fresh twist.
  • Southwestern Pasta Salad: Mix in black beans, corn, diced avocado, and a lime vinaigrette for a zesty flavor.
  • Asian Noodle Salad: Use soba noodles, add shredded carrots, bell peppers, and toss with sesame dressing.

Storage and Make-Ahead Instructions

Storing your pasta salad properly can enhance its longevity and flavor:

  • Refrigerate: Store in an airtight container for up to 4 days.
  • Freezing: We donโ€™t recommend freezing this salad, as the texture of the pasta and veggies will suffer.
  • Make Ahead: Prepare the salad a day in advance; it often tastes better the next day!

Frequently Asked Questions

Here are some common questions related to this pasta salad:

  • Can I use whole wheat pasta? Yes, whole wheat pasta adds fiber and a nutty flavor.
  • Is this salad gluten-free? You can use gluten-free pasta to make it suitable for a gluten-free diet.
  • How long can I store leftovers? Leftovers can be stored in the fridge for about 4 days.
  • Can I omit the salami? Absolutely! For a vegetarian version, substitute with beans or chickpeas.
  • Whatโ€™s the best way to serve this salad? Itโ€™s delicious cold or at room temperature, making it versatile for any meal.
  • Can I add more veggies? Yes! Feel free to add any seasonal vegetables you enjoy.
  • How can I make this salad vegan? Omit the salami and mozzarella and use maple syrup instead of honey in the dressing.
  • What dressing works best? The homemade dressing is fantastic, but you can also use a store-bought vinaigrette.

Nutrition Tips and Dietary Adaptations

For those watching their nutrition, consider these tips:

  • Increase Fiber: Add more veggies or use whole grain pasta for added fiber content.
  • Lower Fat: Use less olive oil or switch to a vinaigrette for a lighter option.
  • Boost Protein: Add grilled chicken or chickpeas for extra protein and satiety.

Equipment Recommendations

Here are some handy kitchen tools to help you make your pasta salad:

  • Colander: Essential for draining pasta effectively.
  • Mason Jar: Perfect for shaking up your dressing without a mess.
  • Mixing Bowls: A large bowl is great for combining all your ingredients.

Serving Suggestions

This Healthy Pasta Salad pairs wonderfully with a variety of dishes:

  • As a Side Dish: Serve alongside grilled meats or fish for a balanced meal.
  • On a Buffet Table: Ideal for potlucks or gatherings, where it can shine among other dishes.
  • For Lunch: Pack it in a lunchbox with some fresh fruit for a nutritious meal on the go.

In conclusion, this Healthy Pasta Salad is not just a recipeโ€”itโ€™s an invitation to enjoy wholesome, delicious food that fits seamlessly into your life. With its vibrant ingredients and customizable nature, itโ€™s sure to be a hit at your next meal. So roll up your sleeves, gather your ingredients, and letโ€™s make healthy eating enjoyable together!

Healthy Pasta Salad

Prep Time 15 minutes
Cook Time 10 minutes
Total Time 25 minutes
Servings 4 servings
Calories 450
A vibrant and nutritious pasta salad perfect for a quick lunch or picnic, combining fresh vegetables, salami, and a tangy dressing.

Ingredients

pasta

  • 15 oz fusilli pasta

vegetables and salami

  • 1 cup mini mozzarella balls (whole or halved)
  • 1.5 cups halved cherry tomatoes (8 oz)
  • 0.25 cup diced red onion
  • 1 cup halved & sliced cucumber
  • 0.5 cup black olives
  • 0.25 cup chopped parsley
  • 0.5 cup diced salami (5 oz)
  • 0.5 cup diced red bell pepper
  • 0.5 teaspoon dried thyme
  • 0.5 teaspoon dried oregano
  • 0.5 tablespoon lemon juice (juice of ยฝ a lemon)
  • 0.25 cup olive oil
  • 1 teaspoon dijon mustard
  • 1 teaspoon maple syrup
  • 0.25 teaspoon black pepper

Instructions 

  • Cook pasta until al dente, then drain and rinse with cold water.
  • Mix thyme, oregano, lemon juice, olive oil, mustard, syrup, and pepper to make the dressing.
  • Prepare veggies and salami, then combine in a large bowl.
  • Add cooled pasta to the bowl and toss with dressing.
  • Cover and chill for at least 1 hour before serving.

Notes

For extra flavor, add fresh herbs or a squeeze of lemon before serving.
Calories: 450kcal
Cost: $15
Course: Salad
Cuisine: International
Keyword: Pasta

Discover the Magic of Cauliflower Curry

Welcome to the cozy world of cauliflower curry, where comfort meets nutrition in every spoonful. If youโ€™re looking for a dish that is not only delicious but also simple to prepare, this recipe is your answer. With its vibrant flavors and nourishing ingredients, cauliflower curry is perfect for a weeknight dinner or a weekend gathering. Letโ€™s dive into what makes this dish so special and how you can easily whip it up at home!

Why Youโ€™ll Love This Recipe

This cauliflower curry is more than just a meal; it’s a celebration of flavors and health. Here are five reasons you’ll fall in love with this recipe:

  • Quick and Easy: With minimal prep time and straightforward steps, this recipe fits perfectly into your busy schedule.
  • Nutritious and Wholesome: Packed with vitamins and minerals, cauliflower is a fiber-rich vegetable that supports your overall health.
  • Customizable: Adjust the spices and ingredients to suit your taste or dietary preferences. You can even make it vegan by using coconut milk!
  • Budget-Friendly: Using simple ingredients means you can enjoy a delicious meal without breaking the bank.
  • Perfect for Meal Prep: This curry stores well and can be reheated, making it a great option for meal prepping for busy days ahead.

Ingredient Breakdown

Letโ€™s take a closer look at the ingredients that make this cauliflower curry a standout dish. Hereโ€™s what youโ€™ll need:


Professional Chef Knife Set

โ˜… Recommended Kitchen Tool

Professional Chef Knife Set

Make this recipe even easier with a quality Professional Chef Knife Set โ€” a must-have kitchen staple!


๐Ÿ›’ See Deals on Amazon โ†’

As an Amazon Associate, we earn from qualifying purchases.
  • Cauliflower: 1 medium head (about 250 grams), cut into florets. You can also use frozen cauliflower for convenience.
  • Oil: 2 tablespoons of your choice (coconut oil or olive oil work well).
  • Mustard Seeds: ยผ teaspoon (optional) for a burst of flavor.
  • Cumin Seeds: ยฝ teaspoon to enhance the aroma.
  • Curry Leaves: 1 sprig (or bay leaf as an alternative) for added depth.
  • Onions: 1ยผ cups finely chopped (about 2 medium onions).
  • Green Chili: 1, slit or chopped for a little heat (optional).
  • Ginger: ยฝ tablespoon (or 1 teaspoon grated) for warmth.
  • Garlic: ยฝ tablespoon, finely chopped or pressed (2 cloves).
  • Tomatoes: 1 cup, pureed or finely chopped (about 2 medium tomatoes).
  • Salt: ยพ to 1 teaspoon, adjust to taste.
  • Turmeric: ยผ teaspoon for color and health benefits.
  • Red Chili Powder: ยฝ to ยพ teaspoon (I prefer 1 teaspoon Kashmiri chili powder for milder heat).
  • Garam Masala: 1 teaspoon (or 1ยฝ teaspoons if you love spices).
  • Coriander Powder: ยฝ teaspoon (optional).
  • Coconut Milk or Water: ยพ to 1 cup for a creamy texture (I used 1ยผ cups coconut milk for richness).

Step-by-Step Instructions

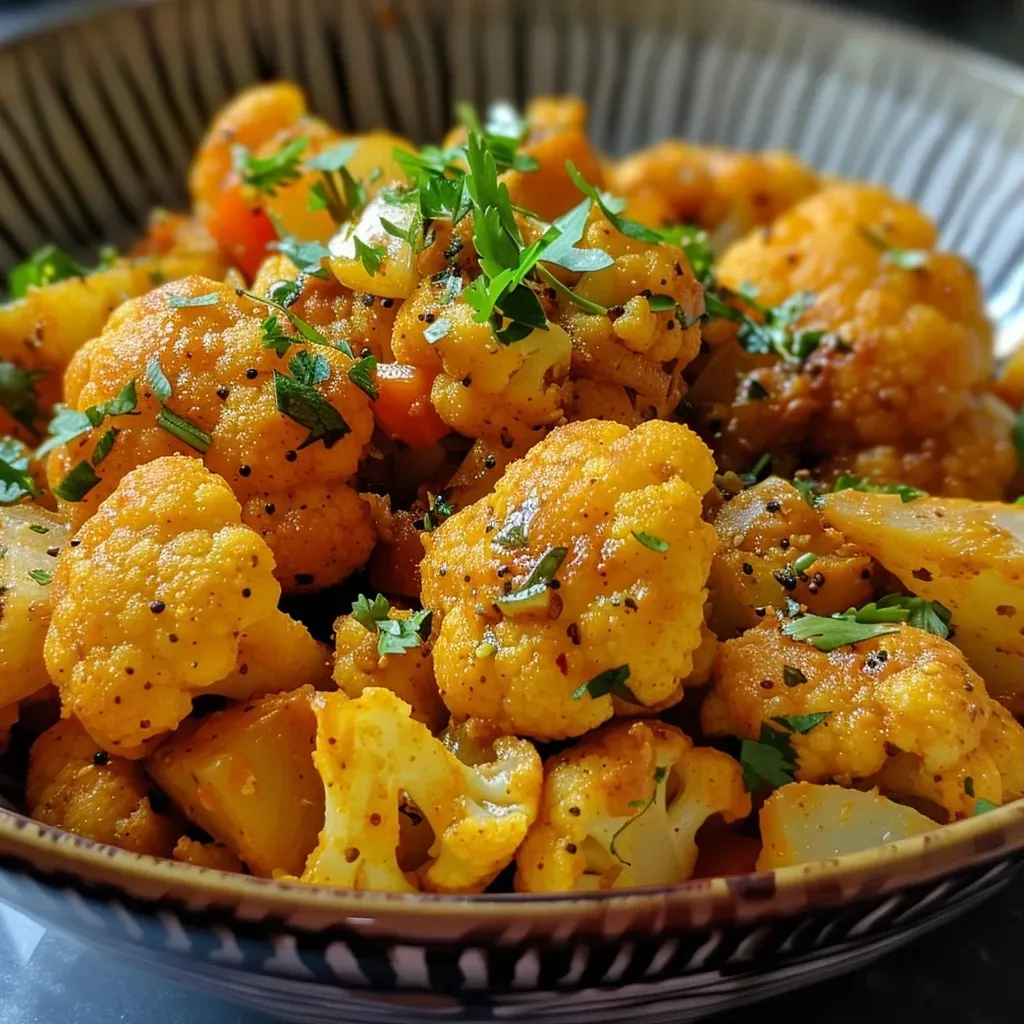
Close-up view of a vibrant cauliflower curry in a bowl, garnished with fresh herbs.

Now, let’s get cooking! Hereโ€™s how to make this mouthwatering cauliflower curry:

  1. In a pan over low to medium heat, add the oil. Once hot, toss in the mustard seeds, cumin seeds, and curry leaves.
  2. When the seeds start to sizzle, add the onions and green chili. Sautรฉ until the onions turn golden, about 5 to 6 minutes. Stir in the ginger and garlic, and sautรฉ for another 30 to 60 seconds.
  3. Add the tomatoes and salt. Cook until the tomatoes break down and meld into the mixture. Then stir in the turmeric, red chili powder, garam masala, and coriander powder. Sautรฉ for an additional 30 to 60 seconds until fragrant.
  4. Introduce the cauliflower florets and sautรฉ for 1 to 2 minutes on medium-high heat.
  5. Pour in ยฝ to 1 cup of water or coconut milk, mixing well. I used 1 cup of water at this step, but feel free to adjust based on your preferred consistency.
  6. Cover the pan and cook until the cauliflower is tender, but not mushy. If necessary, add more water or coconut milk to achieve your desired consistency. I added an extra half cup of coconut milk at this stage for creaminess.
  7. Taste and adjust the salt and garam masala to your liking. Garnish with fresh coriander leaves before serving.

Pro Tips for a Flawless Curry

Want to elevate your cooking game? Here are some expert tips to ensure your cauliflower curry turns out perfect every time:

  • Use Fresh Ingredients: Fresh spices and vegetables enhance the flavor profile of your curry significantly.
  • Control the Heat: Adjust the amount of green chili and red chili powder to suit your taste preferences.
  • Donโ€™t Rush the Cooking: Allow the onions to caramelize properlyโ€”this builds a rich flavor base for your curry.
  • Experiment with Spices: Feel free to add other spices like cardamom or cinnamon for an aromatic twist.
  • Texture Matters: Keep an eye on the cooking time for the cauliflower; you want it tender but not falling apart.
  • Garnish Wisely: Fresh herbs like cilantro or mint can brighten the dish and enhance its presentation.
  • Pair with Grains: Serve over rice or with naan to soak up the delicious sauce.
  • Make It Vegan: Use coconut milk instead of water for a richer, creamier curry.

Common Mistakes and Troubleshooting

Cooking is a journey, and itโ€™s okay to make mistakes! Hereโ€™s how to avoid common pitfalls:

  • Too Watery: If your curry turns out runny, simmer it uncovered to reduce the liquid.
  • Not Flavorful Enough: Ensure you sautรฉ the spices well to unlock their full flavor.
  • Overcooked Cauliflower: Cook the cauliflower until just tender; if itโ€™s mushy, it wonโ€™t hold up well.
  • Too Spicy: If the curry is too hot, add a dollop of yogurt or some sugar to balance the heat.

Delicious Variations to Try

Feeling adventurous? Here are a few tasty variations you can try:

  • Chickpea Cauliflower Curry: Add one can of chickpeas to the curry for extra protein and heartiness.
  • Spinach Addition: Toss in fresh or frozen spinach towards the end of cooking for added greens.
  • Peanut Butter Flavor: Stir in a tablespoon of peanut butter for a unique twist and creaminess.
  • Thai Style: Substitute coconut milk and add Thai curry paste for a different flavor profile.

Storage and Make-Ahead Instructions

This curry is perfect for meal prepping! Here’s how to store it:

  • Refrigeration: Store in an airtight container in the fridge for up to 4 days.
  • Freezing: You can freeze the curry for up to 3 months. Thaw in the fridge overnight before reheating.
  • Reheating: Reheat on the stovetop or microwave until warmed through. Add a splash of water or coconut milk if it thickens.

Frequently Asked Questions

Got questions? Here are some common queries answered:

  • Can I use frozen cauliflower? Absolutely! Just adjust the cooking time accordingly.
  • Is this curry gluten-free? Yes, all the ingredients in this recipe are gluten-free.
  • What can I serve with cauliflower curry? It’s great with rice, naan, or even quinoa for a wholesome meal.
  • How can I make this curry spicier? Add more green chili or red chili powder to increase the heat.
  • Can I make this in advance? Yes, this curry tastes even better the next day!
  • Is it suitable for meal prep? Definitely! Store it in individual portions for easy meals.
  • What if I don’t have curry leaves? Bay leaves can be a good substitute.
  • How can I make it creamier? Use more coconut milk for a rich, creamy texture.

Nutrition Tips and Dietary Adaptations

This cauliflower curry is not only delicious but can also be tailored to fit various dietary needs:

  • Low-Carb: Serve with cauliflower rice instead of regular rice.
  • High-Protein: Add legumes like lentils or chickpeas to boost protein content.
  • Vegan: Ensure all ingredients are plant-based, especially the oils and coconut milk.
  • Nut-Free: Skip any nut-based ingredients, such as peanut butter.

Equipment Recommendations

To make your cooking experience smoother, hereโ€™s a list of useful kitchen tools:

  • Non-stick Pan: Ideal for sautรฉing without sticking.
  • Sharp Knife: For precise chopping of vegetables.
  • Cutting Board: A sturdy surface for preparation.
  • Measuring Cups and Spoons: For accuracy in your recipe.
  • Blender: If you prefer a smoother sauce, a blender can help with pureeing tomatoes.

Serving Suggestions

This delicious cauliflower curry is versatile in its presentation. Here are some ideas on how to serve:

  • With Rice: Serve over steaming basmati or jasmine rice to soak up the flavors.
  • With Naan: Accompany with warm naan bread for dipping.
  • With Salad: A fresh side salad can brighten the meal.
  • Garnish: Top with fresh cilantro or a drizzle of yogurt for added flavor.

Conclusion

Embrace the warmth and comfort of this easy cauliflower curry. With its rich flavors and nourishing ingredients, itโ€™s a go-to recipe that youโ€™ll want to keep in your regular rotation. Remember, healthy eating can be simple and enjoyableโ€”just like this recipe! So grab your ingredients, and letโ€™s get cooking. Youโ€™ve got this!

Cauliflower Curry Recipe

Prep Time 10 minutes
Cook Time 20 minutes
Total Time 30 minutes
Servings 4 servings
Calories 150
A flavorful and easy-to-make cauliflower curry with aromatic spices, perfect for a quick vegetarian meal.

Ingredients

Vegetables

  • 1 medium head cauliflower (about 250 grams)
  • 2 tablespoons oil
  • ยผ teaspoon mustard seeds (optional)
  • ยฝ teaspoon cumin seeds
  • 1 sprig curry leaves (or bay leaf (optional))
  • 1ยผ cups onions (finely chopped (about 2 medium))
  • 1 green chili green chili (slit or chopped (optional))
  • ยฝ tablespoon ginger (very fine chopped or 1 tsp grated)
  • ยฝ tablespoon garlic (cloves, very fine chopped or pressed)
  • 1 cup tomatoes (pureed or finely chopped)
  • ยพ to 1 teaspoon salt (adjust to taste)
  • ยผ teaspoon turmeric (haldi)
  • ยฝ to ยพ teaspoon red chili powder (e.g., 1 tsp Kashmiri chili powder)
  • 1 teaspoon garam masala (or curry powder)
  • ยฝ teaspoon coriander powder (optional)
  • ยพ to 1 cups water or coconut milk (I used 1ยผ cup coconut milk)

Instructions 

  • Heat oil in a pan over low to medium flame. Add mustard, cumin, and curry leaves.
  • Add onions and green chili; sautรฉ until golden, about 5-6 mins. Stir in ginger and garlic; sautรฉ 30-60 seconds.
  • Add tomatoes and salt; cook until tomatoes break down. Mix in turmeric, chili powder, garam masala, and coriander; sautรฉ until fragrant.
  • Add cauliflower florets; sautรฉ 1-2 mins. Pour water or coconut milk; mix well.
  • Cover and cook until cauliflower is tender. Adjust seasoning; garnish with coriander leaves.

Notes

You can adjust the water and spices to suit your taste. Young cauliflower releases moisture, so add water gradually.
Calories: 150kcal
Cost: $8
Course: Main Course
Cuisine: Indian
Keyword: Cauliflower

Discover the Art of a Flavorful Stir Fry Sauce

If you’re looking to enhance your meals with a delicious homemade sauce, you’re in the right place! This stir fry sauce recipe is not just easy to whip up; it’s packed with flavor and ideal for elevating any dish. Whether you’re a busy professional, a parent juggling activities, or someone who simply loves to cook, this sauce is your secret weapon for quick, nutritious meals. Let’s dive into the world of stir fry sauces and discover how you can make your meals healthier and more enjoyable!

Why Youโ€™ll Love This Recipe

This homemade stir fry sauce has a multitude of benefits that make it a staple in your kitchen:

  • Versatile Flavor: With the perfect balance of savory, sweet, and umami, this sauce complements a variety of proteins and vegetables.
  • Quick Preparation: Whip it up in less than 10 minutes, making it ideal for any weeknight dinner.
  • Healthier Ingredients: Control what goes into your sauceโ€”no preservatives or artificial additives here!
  • Customizable: Adjust the ingredients to suit your dietary needs or flavor preferences.
  • Batch-Friendly: Make a large batch and store it for later use, saving you time in future meal prep.

Ingredient Breakdown and Substitutions

Understanding the ingredients in your sauce is crucial for both taste and nutrition. Hereโ€™s what youโ€™ll need:


Digital Kitchen Scale

โ˜… Recommended Kitchen Tool

Digital Kitchen Scale

Make this recipe even easier with a quality Digital Kitchen Scale โ€” a must-have kitchen staple!


๐Ÿ›’ See Deals on Amazon โ†’

As an Amazon Associate, we earn from qualifying purchases.
  • 1/2 cup reduced sodium soy sauce: or use tamari sauce for a gluten-free option.
  • 1/2 cup no salt-added chicken broth: Perfect for a savory base. Vegetable broth works great for a plant-based option.
  • 1/4 cup natural peanut butter: This adds creaminess and a nutty flavor. Almond butter or sunflower seed butter can be used as alternatives.
  • 1 teaspoon toasted sesame oil: A little goes a long way in adding depth to the flavor.
  • 1 teaspoon rice vinegar: This provides a slight tang; apple cider vinegar can be a substitute.
  • 1 tablespoon honey: Use maple syrup for a vegan option.
  • 2-3 inches fresh ginger: Finely grated for a spicy kick.
  • 3-4 garlic cloves: Minced to enhance flavor.
  • 1 tablespoon cornstarch: For thickening the sauce.
  • Pinch of red pepper flakes: Adjust according to your heat preference.

How to Make Your Homemade Stir Fry Sauce

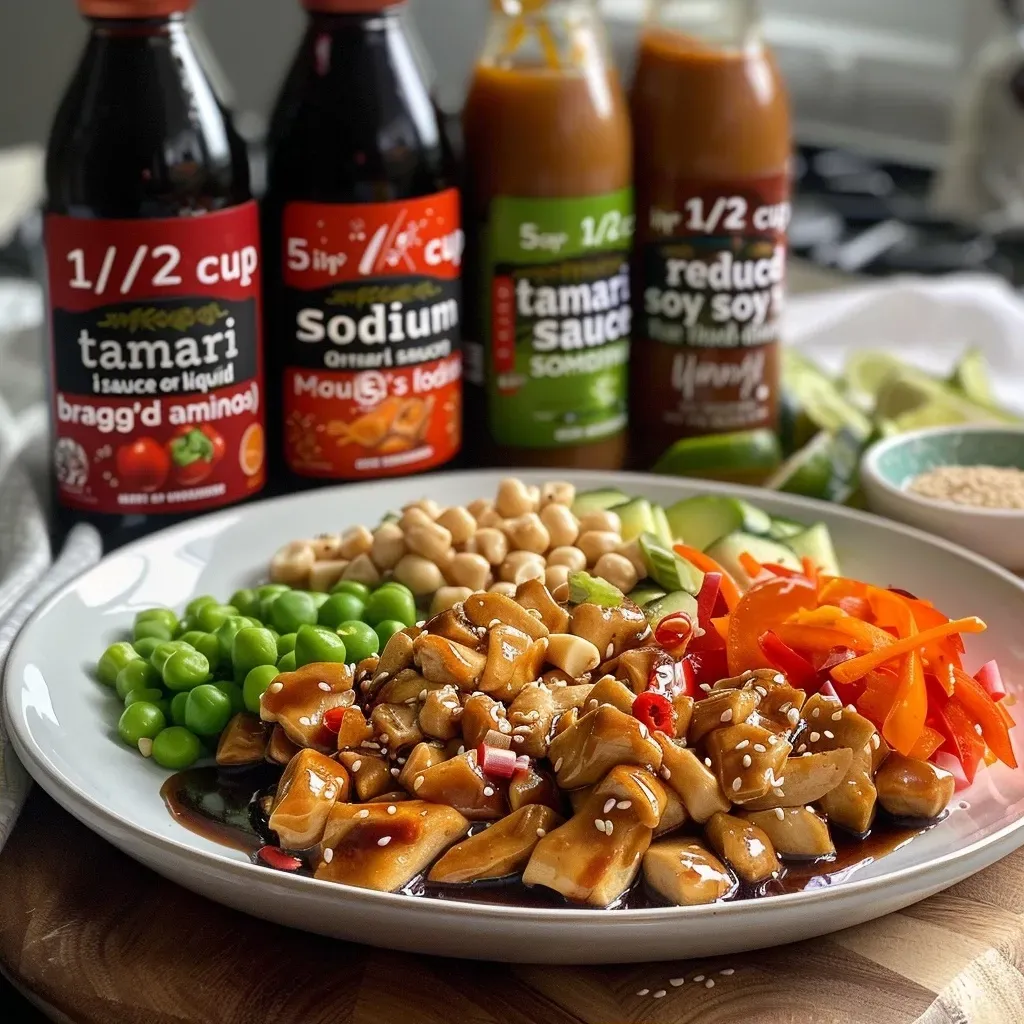
Close-up view of a jar filled with homemade stir fry sauce and ingredients on a wooden surface.

Creating your stir fry sauce is quick and straightforward:

  1. In a mason jar or bowl, whisk together all of the ingredients until well combined. If you prefer, you can blend them in a mini blender for a smoother texture.
  2. Add the desired amount of sauce to your stir fry. Allow it to cook in the sauce for at least 2-3 minutes to let it thicken slightly and infuse the flavors into your dish.

Expert Tips for Perfecting Your Sauce

Here are some tips to ensure your sauce turns out perfect every time:

  • Balance is Key: Taste the sauce before adding it to your stir fry and adjust the sweetness or saltiness if needed.
  • Thickening Techniques: If you want a thicker sauce, let it simmer longer or add a touch more cornstarch mixed with water.
  • Fresh Ingredients: Use fresh ginger and garlic for the best flavorโ€”dried versions won’t provide the same punch!
  • Store Properly: Keep your sauce in an airtight container in the fridge for up to a week.
  • Make It Ahead: You can prepare the sauce in advance and store it for quick meals during the week.
  • Experiment with Flavors: Try adding different spices or fresh herbs to customize the flavor profile.
  • Use as a Marinade: This sauce can double as a marinade for meats or tofu, enhancing flavor before cooking.
  • Donโ€™t Skip the Resting Time: Allow the sauce to sit for a few minutes after mixing; this helps enhance the flavors.

Common Mistakes and Troubleshooting

Even the best cooks encounter hiccups. Here are some common mistakes to avoid:

  • Overcooking the Sauce: If you cook the sauce too long, it can become overly thick or lose flavor. Aim for a simmer, not a boil.
  • Too Much Salt: Using regular soy sauce can lead to a salty sauce. Always opt for low-sodium options where possible.
  • Skipping the Thickener: If you want a thick sauce, donโ€™t forget the cornstarch! Itโ€™s essential for that perfect consistency.
  • Ignoring Storage Guidelines: Improper storage can lead to spoilage. Always use an airtight container.

Variations of Your Stir Fry Sauce

Feeling adventurous? Here are some variations to try:

  • Spicy Sriracha Sauce: Add sriracha for a spicy kick that elevates your stir fry.
  • Sweet and Sour Twist: Mix in pineapple juice for a sweet and tangy flavor.
  • Sesame Ginger Sauce: Add more sesame oil and toasted sesame seeds for a nutty flavor.
  • Citrus Burst: Include lime or lemon juice for a refreshing twist on the classic recipe.

Storage and Make-Ahead Instructions

To keep your sauce fresh and ready to use:

  • Refrigerate: Store your sauce in a sealed container in the refrigerator for up to one week.
  • Freeze: This sauce can be frozen in ice cube trays for easy portioning. Just thaw what you need!
  • Make-Ahead: Whip up a double batch and store it for quick meals later in the week!

Frequently Asked Questions

Here are some common questions about stir fry sauce:

  • Can I use this sauce for other dishes? Yes! It works great as a marinade for meats, drizzled over roasted vegetables, or even as a dressing for salads.
  • Is this sauce gluten-free? If you use tamari sauce or coconut aminos, it can be gluten-free!
  • How can I make it vegan? Simply substitute honey with maple syrup and ensure your broth is vegetable-based.
  • What vegetables pair well with this sauce? Broccoli, bell peppers, snap peas, and carrots work beautifully with this sauce.
  • Can I make it spicy? Absolutely! Add red pepper flakes or sriracha to heat things up.
  • How do I store leftovers? Keep leftover stir fry with sauce in an airtight container in the fridge for up to 3 days.
  • Can I double this recipe? Yes! This sauce scales easily, so feel free to make a larger batch.
  • Is it okay to use store-bought sauces? While homemade is best, store-bought options can work in a pinch. Just check the ingredients.

Nutrition Tips and Dietary Adaptations

When it comes to healthy eating, consider these tips:

  • Opt for Whole Ingredients: Using whole, fresh ingredients enhances the nutritional value of your meals.
  • Balance Your Plate: Pair your stir fry with a whole grain like brown rice or quinoa for a complete meal.
  • Watch Your Portions: While this sauce is healthy, moderation is key. Be mindful of how much you use.

Essential Equipment for Making Stir Fry Sauce

To make your stir fry sauce effectively, you’ll need:

  • Mason Jar or Bowl: For mixing your ingredients.
  • Whisk or Mini Blender: To ensure your sauce is smooth and well combined.
  • Measuring Cups and Spoons: For accurate ingredient measurements.

Serving Suggestions

Now that your sauce is ready, here are some ways to serve it:

  • Stir Fry: Toss your favorite proteins and vegetables in a hot pan with the sauce.
  • As a Marinade: Marinate chicken, beef, or tofu before cooking for added flavor.
  • Drizzle Over Rice or Noodles: Use this sauce to enhance plain rice or noodles for instant flavor.

Conclusion

Creating a homemade stir fry sauce doesnโ€™t have to be complicated. With just a few simple ingredients and steps, you can elevate your meals and enjoy the delicious flavors that come from making it yourself. Remember, healthy eating is all about balance and enjoyment, so donโ€™t hesitate to experiment with different flavors and ingredients. Happy cooking!

Healthy Homemade Stir Fry Sauce Recipe

Prep Time 5 minutes
Cook Time 5 minutes
Total Time 10 minutes
Servings 4 servings
Calories 150
This flavorful stir fry sauce is quick to make and perfect for adding a savory, nutty kick to your vegetables and proteins.

Ingredients

Sauce ingredients

  • 1/2 cup reduced sodium soy sauce ((or use tamari sauce or Bragg’s liquid aminos))
  • 1/2 cup no salt-added chicken broth
  • 1/4 cup natural peanut butter
  • 1 teaspoon toasted sesame oil
  • 1 teaspoon rice vinegar
  • 1 tablespoon honey ((can also sub in maple syrup))
  • 2-3 inches fresh ginger ((finely grated))
  • 3-4 cloves garlic ((minced))
  • 1 tablespoon cornstarch
  • Pinch red pepper flakes

Instructions 

  • Whisk all sauce ingredients in a bowl until well combined.
  • Add sauce to stir fry and cook for 2-3 minutes until slightly thickened.

Notes

Adjust the amount of red pepper flakes for desired spice level.
Calories: 150kcal
Cost: $10
Course: Main Course
Cuisine: Asian
Keyword: healthy, sauce, stir-fry

Transform Your Ground Beef with This Flavor-Packed Seasoning Blend

If youโ€™re looking to elevate your weeknight dinners, you’ve landed in the right place. This simple ground beef seasoning blend adds incredible flavor to your meals without any fuss. Perfect for busy evenings, this recipe is a game-changer for family dinners! With just a few ingredients, you can turn ordinary ground beef into a delicious centerpiece for various dishes. Whether you’re making tacos, burgers, or spaghetti, this seasoning will enhance every bite.

Why Youโ€™ll Love This Recipe

Here are five specific benefits of using this homemade ground beef seasoning:

  • Quick and Easy: With just a few pantry staples, this seasoning blend can be whipped up in minutes, making it perfect for busy weeknights.
  • Healthier Option: Control the ingredients and avoid preservatives found in store-bought mixes, allowing you to create a healthier alternative.
  • Customizable Flavor: Adjust the spice levels to suit your familyโ€™s taste preferences, making it versatile for any dish.
  • Cost-Effective: Save money by using pantry staples instead of expensive pre-packaged seasonings.
  • Great for Meal Prep: Make a big batch and store it for future use, cutting down on cooking time on hectic nights.

Ingredients Breakdown

Hereโ€™s what you need to make this seasoning blend:


Digital Meat Thermometer

โ˜… Recommended Kitchen Tool

Digital Meat Thermometer

Make this recipe even easier with a quality Digital Meat Thermometer โ€” a must-have kitchen staple!


๐Ÿ›’ See Deals on Amazon โ†’

As an Amazon Associate, we earn from qualifying purchases.
  • 1 teaspoon salt: Enhances all the flavors in your beef.
  • 1/2 teaspoon garlic powder: Adds a savory depth that complements the beef.
  • 1/2 teaspoon cumin: Provides an earthy warmth that pairs beautifully with the other spices.
  • 1/2 teaspoon crushed red pepper flakes: Introduces a touch of heat; feel free to adjust based on your preference.
  • 1/4 teaspoon dried oregano: Brings an aromatic herbiness that lightens the overall flavor.
  • 1/4 teaspoon onion powder: Adds sweetness and depth without the need for fresh onions.
  • 1/4 teaspoon ground black pepper: A crucial seasoning that rounds out the flavor profile.

Substitutions and Variations

Close-up of ground beef seasoning mixture in a bowl.

If youโ€™re missing an ingredient or want to try something new, here are some substitutions and variations:

  • Sea salt: Use sea salt instead of table salt for a different flavor profile.
  • Smoked paprika: Swap out the cumin for smoked paprika to add a smoky flavor.
  • Fresh herbs: Use fresh oregano or parsley instead of dried for a brighter taste.
  • Low-sodium options: For a lower sodium version, reduce the salt and use sodium-free garlic and onion powders.

Pro Tips for Perfect Seasoning

Here are some expert insights to make your seasoning blend shine:

  • Mix thoroughly: Combine the spices in a small bowl until well-blended to ensure even distribution.
  • Toast the spices: For deeper flavor, lightly toast the spices in a dry skillet before mixing.
  • Store properly: Keep your spice blend in an airtight container in a cool, dark place to preserve freshness.
  • Use fresh spices: Ensure your spices are fresh for the best flavor; replace them every 6 months to a year.
  • Adjust to taste: Donโ€™t be afraid to taste and adjust the seasoning to fit your family’s preferences.
  • Use a digital scale: If youโ€™re serious about precision, weigh your spices for the most accurate measurements.
  • Batch it up: Make a double or triple batch and store it for quick meals throughout the week.
  • Label your jars: Donโ€™t forget to label your spice jars with the date and contents to keep track of freshness.

Common Mistakes and Troubleshooting

Even the best cooks can make mistakes! Hereโ€™s how to avoid common pitfalls:

  • Over-seasoning: Start with less seasoning and add more as needed; itโ€™s easier to add than to take away.
  • Ignoring freshness: Dull spices can lead to lackluster flavor; always check the expiration date.
  • Not adjusting for heat: If using crushed red pepper, adjust the amount based on your family’s heat tolerance.
  • Skipping the toasting step: Toasting spices can significantly enhance the flavors; donโ€™t skip this step!

Storage and Make-Ahead Instructions

To keep your seasoning fresh and flavorful:

  • Store in an airtight container: Use a glass jar or a spice container to prevent moisture from affecting the blend.
  • Cool, dark place: Keep your spices away from heat sources and direct sunlight to prolong freshness.
  • Make in advance: This seasoning can be made ahead of time, allowing you to save precious minutes on busy nights.

Comprehensive FAQ

Here are some frequently asked questions about ground beef seasoning:

  • How much seasoning should I use per pound of ground beef? A general rule is about 1 tablespoon of seasoning per pound of raw beef.
  • Can I use this seasoning for other meats? Absolutely! This blend works well with turkey, chicken, or pork as well.
  • How long does the seasoning last? When stored properly, this seasoning can last for up to 6 months.
  • What if I donโ€™t have all the spices? Feel free to substitute with what you have; just aim to maintain the balance of flavors.
  • Can I use fresh garlic instead of garlic powder? Yes, but be mindful that fresh garlic can have a stronger flavor, so adjust accordingly.
  • Is this seasoning gluten-free? Yes, all the ingredients are naturally gluten-free!
  • Can I adjust the heat level? Yes, adjust the amount of crushed red pepper flakes according to your taste.
  • What dishes can I use this seasoning in? Itโ€™s great for tacos, burgers, meatballs, and even chili!

Nutrition Tips and Dietary Adaptations

This seasoning blend is not only delicious but can also fit into various dietary lifestyles:

  • Low-carb: This blend is perfect for low-carb diets when paired with vegetables instead of grains.
  • Paleo-friendly: All ingredients are compliant with paleo diets; just ensure your beef is grass-fed.
  • Whole30 approved: Itโ€™s an excellent option for those on a Whole30 journey, too!
  • Vegetarian alternative: Consider using this blend with plant-based ground meat alternatives for a vegetarian option.

Equipment Recommendations

Using the right tools can make a difference in your cooking experience:

  • Measuring spoons: Invest in a good set of measuring spoons for precise measurements.
  • Mixing bowl: A medium-sized bowl is perfect for combining your spices.
  • Air-tight containers: Use these for storing your seasoning to keep it fresh longer.

Serving Suggestions

Here are some ideas on how to use your ground beef seasoning:

  • Tacos: Use it to season ground beef for flavorful tacos topped with fresh veggies and cheese.
  • Burgers: Mix the seasoning into the beef before grilling for juicy, flavorful burgers.
  • Meatballs: Add the seasoning to your meatball mixture for a zesty twist.
  • Chili: Stir it into chili for an extra kick of flavor.

In conclusion, making your own ground beef seasoning blend is an easy and rewarding process that can transform your meals. With this guide, you now have all the tools, tips, and tricks to create a seasoning that fits your familyโ€™s tastes perfectly. Remember, healthy eating doesn’t have to be complicated or restrictive; it’s about enjoying good food while nourishing your body. Happy cooking!

Ground Beef Seasoning

Prep Time 5 minutes
Cook Time 10 minutes
Total Time 15 minutes
Servings 4 servings
Calories 250
A flavorful homemade seasoning blend perfect for enhancing ground beef dishes with bold spices.

Ingredients

Spice Mix

  • 1 teaspoon salt
  • 1/2 teaspoon garlic powder
  • 1/2 teaspoon cumin
  • 1/2 teaspoon crushed red pepper flakes
  • 1/4 teaspoon dried oregano
  • 1/4 teaspoon onion powder
  • 1/4 teaspoon ground black pepper

Instructions 

  • Combine all spices in a small bowl and stir till combined.
  • Heat a tablespoon of oil in a skillet over medium-high heat.
  • Add ground beef to the skillet and cook until browned, flipping as needed.
  • Create a well in the beef, add spice blend, and stir for 20 seconds.
  • Mix spices into beef and cook until fully done.

Notes

This seasoning can be stored in an airtight container for future use.
Calories: 250kcal
Cost: $3
Course: Main Course
Cuisine: American
Keyword: ground beef, seasoning

Welcome to Your Tropical Getaway: The Ultimate Caribbean Smoothie Recipe

Have you ever craved a taste of the tropics? This Caribbean Smoothie is your answer! With its vibrant colors and refreshing flavors, itโ€™s like a mini vacation in a glass. Packed with nutrient-dense ingredients, this smoothie not only tastes amazing but also gives your body a boost of energy. Letโ€™s dive into the delightful world of smoothie-making, where healthy eating becomes a joyful experience!

Why Youโ€™ll Love This Caribbean Smoothie

This smoothie is not just a treat for your taste buds but also a powerhouse of nutrition. Here are some reasons why youโ€™ll fall in love with this recipe:

  • Quick and Easy: Takes just 5 minutes to prepare. Perfect for busy mornings or a post-workout snack!
  • Wholesome Ingredients: Made with frozen fruits and natural juices, ensuring a delicious taste without any artificial additives.
  • Customizable: Feel free to swap in your favorite fruits or add extras like protein powder for an extra boost.
  • Colorful and Inviting: Bright and vibrant colors make it visually appealing, perfect for impressing family and friends.
  • Health Benefits: Rich in vitamins, minerals, and antioxidants that support overall health and wellness.

Ingredient Breakdown: What Youโ€™ll Need

Letโ€™s take a closer look at each ingredient in this delightful smoothie:


Glass Mason Jars for Oats

โ˜… Recommended Kitchen Tool

Glass Mason Jars for Oats

Make this recipe even easier with a quality Glass Mason Jars for Oats โ€” a must-have kitchen staple!


๐Ÿ›’ Check Price on Amazon โ†’

As an Amazon Associate, we earn from qualifying purchases.
  • 1 banana, frozen, sliced: Adds natural sweetness and creaminess. You can substitute with a ripe fresh banana if you prefer.
  • 1 cup strawberries, frozen: Brings a burst of flavor and vibrant color. Fresh strawberries work too, but frozen gives a smoother texture.
  • 1 cup papaya juice: This tropical juice forms the base of the smoothie. Feel free to substitute with orange juice or coconut water for a different flavor.
  • 2 tbsp turbinado, raw sugar: Enhances sweetness; adjust based on your taste. You can use honey or agave syrup as alternatives.
  • 1 cup ice: Helps to chill the smoothie and make it refreshing. Omit if you prefer a thicker consistency.
  • 1 scoop Collagen Boost, optional: Great for skin health and added protein; you can use any protein powder if desired.

Pro Tips for the Perfect Smoothie

Close-up view of a vibrant Caribbean smoothie with fruit ingredients visible.

To ensure your Caribbean Smoothie turns out perfectly every time, consider these expert tips:

  • Use Frozen Fruits: For a thicker and creamier texture, using frozen fruits is key. They also help keep your smoothie cold.
  • Layer Ingredients Smartly: When blending, add liquids first, followed by soft ingredients, and then hard ones on top to prevent jamming.
  • Donโ€™t Over-Blend: Aim for a silky consistency; over-blending can lead to a thin texture.
  • Adjust Sweetness: Taste as you go! Everyoneโ€™s sweetness preference is different, so adjust sugar or sweetener accordingly.
  • Experiment with Add-Ins: Consider adding spinach for extra nutrients or chia seeds for omega-3 fatty acids.
  • Serve Cold: Enjoy immediately for the best flavor and texture. If storing, keep it in an airtight container in the fridge for up to 24 hours.
  • Garnish Creatively: Top your smoothie with sliced fruits, granola, or coconut flakes for added texture and visual appeal.
  • Make it a Meal: Add oats or nut butter to make it a more filling breakfast option.

Avoid Common Mistakes

While making smoothies is generally straightforward, here are some common pitfalls to avoid:

  • Too Much Liquid: Adding excess liquid can dilute the flavor and texture. Start with less and add more as needed.
  • Neglecting Balance: Ensure a balance of fruits, vegetables, and protein to create a well-rounded smoothie.
  • Ignoring Texture: If your smoothie is too thick, add a splash of water or juice. If it’s too thin, add more frozen fruit or ice.
  • Skipping Tasting: Always taste your smoothie before serving to adjust flavors as needed.

Delicious Variations to Try

Feeling adventurous? Here are some fun variations of the Caribbean Smoothie that you can whip up:

  • Berry Blast: Replace strawberries with a mix of blueberries, raspberries, and blackberries for a berry-infused delight!
  • Tropical Green: Add a handful of spinach or kale for a nutrient boost without sacrificing flavor.
  • Peanut Butter Paradise: Blend in a tablespoon of peanut butter for a creamy, nutty twist.
  • Coconut Dream: Substitute papaya juice with coconut milk for a tropical coconut flavor.

Storage and Make-Ahead Tips

Want to prepare your smoothie ahead of time? Hereโ€™s how:

  • Pre-Prep Ingredients: Chop and freeze fruits in individual bags for quick blending. You can also pre-measure your ingredients.
  • Make in Advance: You can blend the smoothie and store it in the fridge for up to 24 hours. Just shake or stir well before consuming.
  • Freezing Smoothies: Freeze your blended smoothie in an ice cube tray for easy portions. Just blend cubes with a little liquid when you’re ready to enjoy!

Frequently Asked Questions

Here are some common questions about making this Caribbean Smoothie:

  • Can I use fresh fruits instead of frozen? Yes, but the texture may be less creamy. Add ice to achieve a similar consistency.
  • Is this smoothie suitable for kids? Absolutely! Itโ€™s a healthy and delicious option for children.
  • How can I make this smoothie vegan? Simply skip the collagen or use a plant-based protein powder.
  • Can I use a different type of juice? Yes, any fruit juice can work. Just be mindful of the sweetness.
  • Is this smoothie gluten-free? Yes, all the ingredients are gluten-free.
  • How many servings does this recipe make? This recipe serves two, perfect for sharing!
  • Can I add vegetables? Yes! Spinach or kale can easily be blended in without altering the taste much.
  • How can I make it more filling? Add oats, avocado, or nut butter for additional fiber and healthy fats.

Nutritional Benefits of Your Caribbean Smoothie

Understanding the health benefits of your ingredients can motivate you to enjoy this smoothie even more:

  • Bananas: Full of potassium and vitamin B6, bananas help maintain heart health and energy levels.
  • Strawberries: An excellent source of vitamin C, they also provide antioxidants that protect against cellular damage.
  • Papaya Juice: Rich in vitamins A and C, papaya supports skin health and boosts the immune system.
  • Turbinado Sugar: Provides minerals like calcium and iron, making it a better option than refined sugars.
  • Collagen: Supports skin elasticity and joint health when included in your smoothies.

Equipment Recommendations for Smoothie Success

To create the perfect smoothie, having the right equipment is essential. Hereโ€™s what I recommend:

  • High-Speed Blender: Invest in a quality blender that can handle frozen fruits for a smooth blend.
  • Measuring Cups and Spoons: Accurate measurements ensure your smoothie is perfect every time.
  • Reusable Straws: Eco-friendly straws enhance your smoothie experience and are great for the environment!

Serving Suggestions to Enhance Enjoyment

Make your smoothie experience even better with these serving ideas:

  • Serve in Fun Glassware: Use colorful glasses or mason jars to make your smoothie visually appealing.
  • Garnish Creatively: Top with sliced fruits, shredded coconut, or a drizzle of honey for extra flair.
  • Pair with Healthy Snacks: Enjoy with a handful of nuts or a piece of whole-grain toast for a more balanced meal.

Final Thoughts: Embrace the Joy of Healthy Eating

Making this Caribbean Smoothie is not just about the delicious flavors; itโ€™s about embracing a healthier lifestyle thatโ€™s enjoyable and fulfilling. With its simple ingredients and quick preparation, itโ€™s a recipe that fits seamlessly into any busy schedule. So grab your blender, and let this smoothie bring a taste of the tropics to your day! Remember, healthy eating should feel like a treat, not a chore. Enjoy!

Smoothie King Caribbean Way Recipe

Prep Time 5 minutes
Total Time 5 minutes
Servings 1 serving
Calories 250
A delicious and refreshing smoothie inspired by Caribbean flavors, perfect for a quick boost of energy and nutrients.

Ingredients

Fruits and liquids

  • 1 piece banana, frozen, sliced
  • 1 cup strawberries, frozen
  • 1 cup papaya juice
  • 2 tbsp turbinado, raw sugar
  • 1 cup ice
  • 1 scoop Collagen Boost, optional

Instructions 

  • Place banana, strawberries, papaya juice, sugar, and ice into a blender and secure the lid.
  • Start blending on low and increase to high until smooth, about 30 seconds.
  • Pour into a glass and serve immediately.

Notes

You can add a scoop of protein powder for extra nutrition.
Calories: 250kcal
Cost: $15
Course: Beverage
Cuisine: Caribbean
Keyword: Smoothie

Healthy eating doesnโ€™t have to be complicated, and this quick and nourishing chicken stir fry is the perfect example. With colorful veggies and tender chicken, this dish is not only delicious but also packed with nutrients. Whether you’re looking for a quick weeknight dinner or a meal prep option, this healthy chicken stir fry will fit seamlessly into your busy life.

In this article, weโ€™ll explore everything from ingredient breakdowns to expert tips, ensuring you can make this dish with confidence and ease. Let’s dive into why youโ€™ll love this recipe and how to make it your own!

Why You’ll Love This Recipe

  • Quick preparation: Ready in under 30 minutes, making it perfect for busy weeknights.
  • Nutritious ingredients: Packed with veggies like broccoli, bell peppers, and onions for a colorful and healthy meal.
  • Flexible variations: Easily customize with your favorite vegetables or proteins to suit your taste.
  • Meal prep friendly: Great for batch cooking; leftovers keep well in the fridge.
  • Delicious flavor: A savory stir fry sauce complements the dish, making it satisfying and enjoyable.

Ingredients Breakdown

This chicken stir fry recipe uses simple, wholesome ingredients that you can easily find. Hereโ€™s what youโ€™ll need:


Air Fryer XL

โ˜… Recommended Kitchen Tool

Air Fryer XL

Make this recipe even easier with a quality Air Fryer XL โ€” a must-have kitchen staple!


๐Ÿ›’ See Deals on Amazon โ†’

As an Amazon Associate, we earn from qualifying purchases.
  • 1 1/4 pounds boneless chicken breast or thighs: Cut into 1-inch pieces for even cooking. You can substitute with tofu or shrimp for a different protein.
  • 1 large white onion: Thinly sliced to add sweetness and depth to the stir fry.
  • 2 large bell peppers: Use any color you likeโ€”red, yellow, or green will all work beautifully.
  • 1 pound broccoli: Chopped into small florets, providing crunch and nutrients.
  • 3 large garlic cloves: Minced for aromatic flavor.
  • 1 inch ginger: Peeled and minced, adding a zesty kick.
  • 1 3/4 cup chicken stock: Low sodium is preferred to control salt levels.
  • 1/4 cup soy sauce: I recommend using Bragg’s liquid aminos for a gluten-free option.
  • 2 tablespoons honey, maple syrup, or brown sugar: For a touch of sweetness that balances the savory sauce.
  • 1 tablespoon rice vinegar: Adds acidity and brightness to the dish.
  • 3 tablespoons cornstarch: To thicken the stir fry sauce.
  • 1 tablespoon sesame seeds: For garnish, adding a nice crunch.
  • 2 tablespoons avocado oil: Ideal for frying due to its high smoke point.

How to Make Healthy Chicken Stir Fry

Follow these simple steps to create your healthy chicken stir fry:

  1. Prepare the ingredients: Cut the chicken and vegetables beforehand as stir frying requires quick cooking.
  2. Make the sauce: In a medium bowl, whisk together chicken stock, soy sauce, honey, rice vinegar, garlic, ginger, and cornstarch. Set aside.
  3. Cook the chicken: Preheat a large non-stick skillet over medium heat and add 1 tablespoon of oil. Add the chicken and cook for about 3 minutes on each side until browned. Remove from the skillet and set aside.
  4. Sautรฉ the vegetables: In the same skillet, add another tablespoon of oil, then add the sliced onion and bell peppers. Stir fry for about 2 minutes.
  5. Add broccoli and sauce: Return the skillet to medium heat, add the chopped broccoli, and pour in the prepared stir fry sauce. Stir until the sauce thickens, about 2-3 minutes.
  6. Combine and serve: Return the cooked chicken to the skillet, stir gently, and garnish with sesame seeds. Serve hot over your choice of quinoa, brown rice, or whole wheat pasta.

Pro Tips for the Best Chicken Stir Fry

Close-up view of a colorful chicken stir fry with vegetables.
  • Prep ahead: Have all ingredients ready to go before cooking, as stir frying is a quick process.
  • High heat: Use a high heat setting to achieve that signature stir fry flavor and texture.
  • Donโ€™t overcrowd the pan: Cook in batches if necessary to ensure even cooking.
  • Use fresh ingredients: Fresh vegetables will have better texture and flavor compared to frozen ones.
  • Adjust sweetness: Feel free to modify the sweetness of the sauce according to your preference.
  • Experiment with vegetables: Try adding snap peas, carrots, or zucchini for different flavors and textures.
  • Make it spicy: Add red pepper flakes or sriracha for an extra kick.
  • Garnish wisely: Fresh herbs like cilantro or green onions can elevate the dish.

Common Mistakes and Troubleshooting

Even the best cooks can run into issues! Here are some common mistakes and how to fix them:

  • Overcooked chicken: To avoid dryness, cook chicken just until no longer pink, then remove it from the skillet.
  • Sauce too thick: If your sauce thickens too much, add a bit more chicken stock or water to achieve the desired consistency.
  • Vegetables too soft: Stir fry quickly and keep them slightly crunchy for the best texture.
  • Flavor lacking: Always taste and adjust seasoningโ€”more soy sauce, vinegar, or spices may be needed.

Variations to Try

Make this recipe your own with these tasty variations:

  • Protein swaps: Use beef, shrimp, or tofu for different flavors.
  • Vegetable medley: Switch up the veggies based on whatโ€™s in season or what you have on hand.
  • Curry flavor: Add curry powder to the sauce for a unique twist.
  • Peanut sauce: Substitute the stir fry sauce with a homemade peanut sauce for a nutty flavor.

Storage and Make-Ahead Instructions

This healthy chicken stir fry is perfect for meal prep!

  • Refrigeration: Store leftovers in an airtight container in the fridge for up to 4 days.
  • Freezing: For longer storage, freeze in portions for up to 3 months. Thaw in the fridge before reheating.
  • Reheating: Reheat on the stovetop over medium heat, adding a splash of water or stock to prevent drying out.

Frequently Asked Questions

Here are some common questions and answers about this chicken stir fry:

  • Can I use frozen vegetables? Yes, but fresh vegetables provide better texture and flavor.
  • Is this recipe gluten-free? If you use gluten-free soy sauce or tamari, it can be gluten-free.
  • Can I double the recipe? Absolutely! Just ensure you have a large enough skillet to cook everything evenly.
  • What can I serve with stir fry? Serve it over quinoa, brown rice, or whole wheat noodles.
  • Can I make this vegetarian? Yes! Substitute chicken with tofu or tempeh.
  • How spicy is this dish? Itโ€™s mildly spicy; adjust by adding chili flakes or sriracha to taste.
  • What if I donโ€™t have chicken stock? You can use water or vegetable broth instead.
  • Can I add nuts to this recipe? Yes! Cashews or peanuts would add a delightful crunch.

Nutrition Tips and Dietary Adaptations

This recipe is inherently healthy, but here are some tips for tailored nutrition:

  • Low-carb option: Serve over cauliflower rice instead of grains for a low-carb meal.
  • High-protein option: Add edamame or chickpeas for an extra protein boost.
  • Low-calorie version: Reduce the amount of honey and use less oil while cooking.
  • Vegan version: Replace chicken with tofu and honey with maple syrup for a fully vegan dish.

Equipment Recommendations

To make your cooking experience smoother, hereโ€™s what youโ€™ll need:

  • Large non-stick skillet: Essential for stir frying without sticking.
  • Cutting board and knife: For efficient ingredient prep.
  • Whisk: To mix the stir fry sauce thoroughly.
  • Measuring cups and spoons: For precise ingredient measurements.

Serving Suggestions

Here are some great ideas on how to serve your chicken stir fry:

  • Over rice: Serve it over brown rice, white rice, or quinoa for a filling meal.
  • In wraps: Use lettuce wraps or whole wheat tortillas for a fun twist.
  • With salad: Pair with a fresh salad for extra greens and crunch.
  • As leftovers: Enjoy it cold the next day for a quick lunch option.

In conclusion, this healthy chicken stir fry is not just a meal; it’s a celebration of fresh ingredients and quick cooking. Embrace the joy of cooking and make this dish your own! Remember, healthy eating is about balance, so enjoy every bite without overthinking it.

Healthy Chicken Stir Fry

Prep Time 15 minutes
Cook Time 10 minutes
Total Time 25 minutes
Servings 4 servings
Calories 350
A quick and nutritious stir fry featuring tender chicken and colorful vegetables, perfect for a healthy weeknight dinner.

Ingredients

Protein

  • 1 1/4 pounds boneless chicken breast or thighs (cut into 1 inch pieces)
  • 1 large white onion (thinly sliced)
  • 2 large bell peppers (thinly sliced)
  • 1 pound broccoli (chopped)
  • 3 large garlic cloves (minced)
  • 1 inch ginger (peeled and minced)
  • 1 3/4 cup chicken stock (low sodium)
  • 1/4 cup soy sauce (Bragg’s liquid aminos)
  • 2 tablespoons honey, maple syrup or brown sugar
  • 1 tablespoon rice vinegar
  • 3 tablespoons cornstarch
  • 1 tablespoon sesame seeds (for garnish)
  • 2 tablespoons avocado oil (for frying)

Instructions 

  • Prep all vegetables and chicken before cooking. Whisk together stock, soy sauce, sweetener, vinegar, cornstarch, garlic, and ginger; set aside.
  • Heat 1 tbsp oil in a skillet. Cook chicken until browned, then remove. Stir-fry vegetables for 2 minutes, then set aside.
  • Add broccoli to skillet, pour in sauce, bring to boil, and cook until thickened. Return chicken and vegetables to skillet, stir gently.
  • Turn off heat, garnish with sesame seeds, and serve hot over grains.

Notes

Use prepped ingredients for quick cooking. Adjust sauce thickness by simmering longer if needed.
Calories: 350kcal
Cost: $15
Course: Main Course
Cuisine: Asian
Keyword: Chicken, stir-fry